
Main Screen
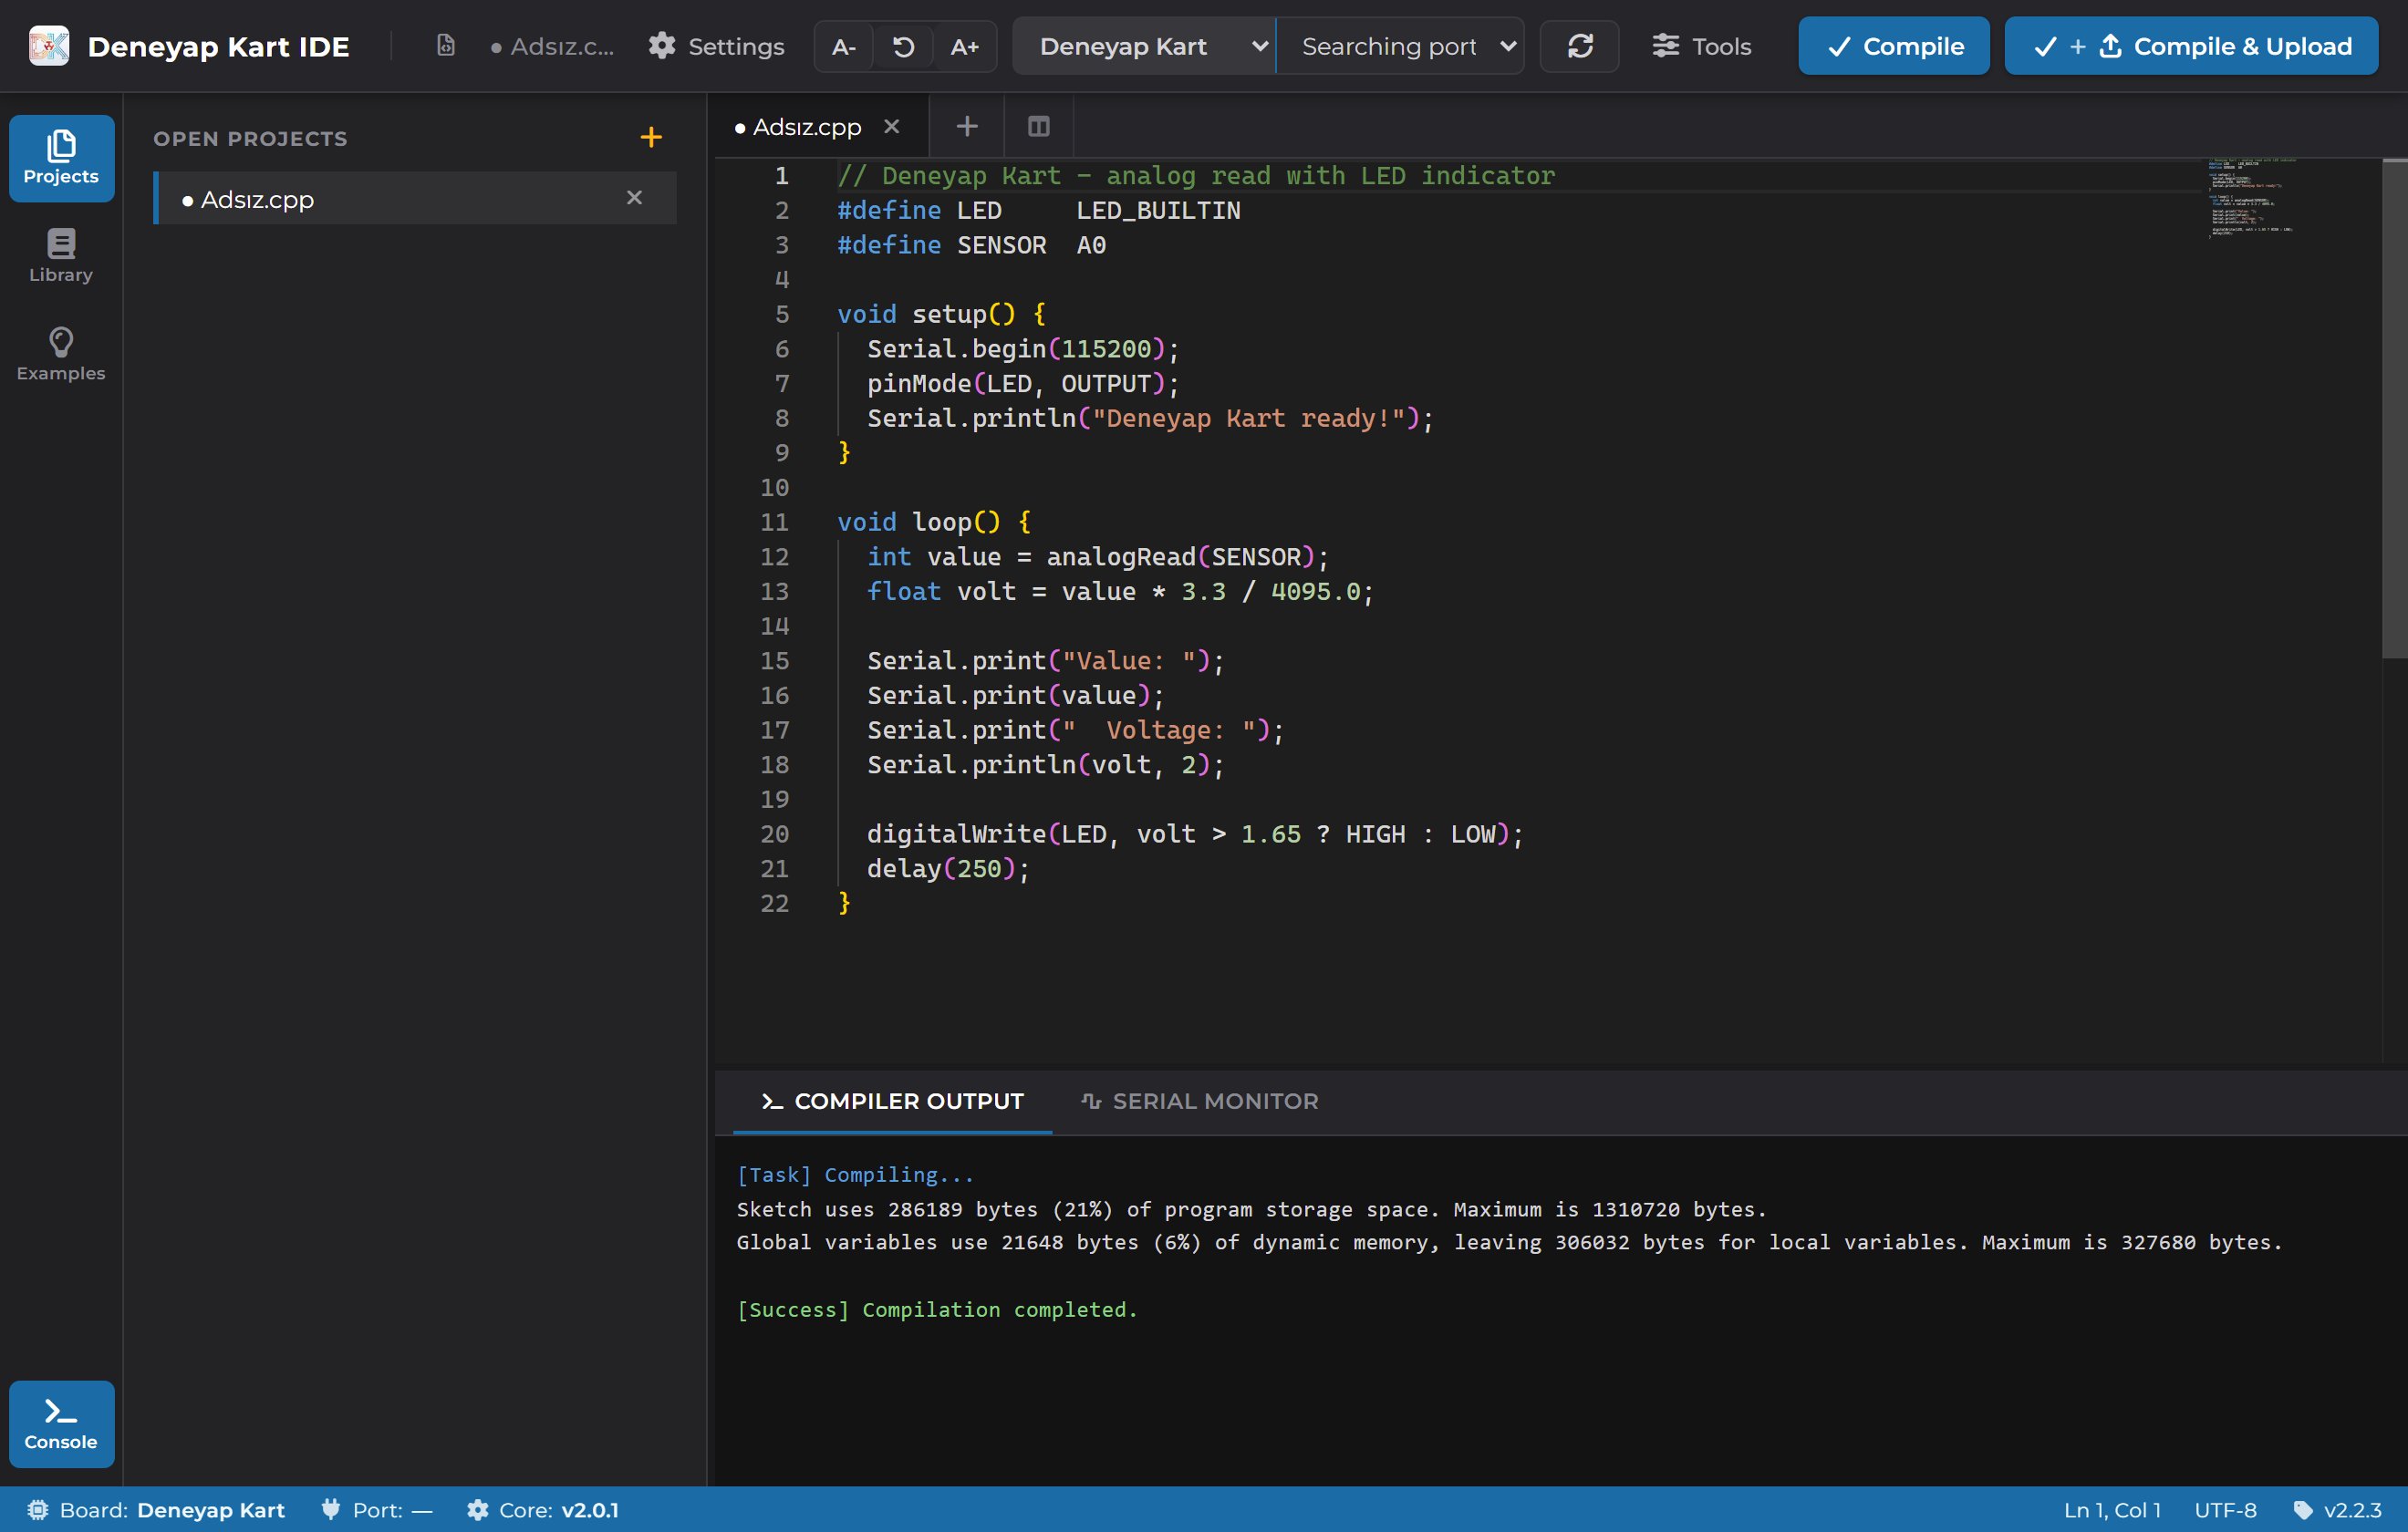
Deneyap Kart IDE Main Screen
Top Toolbar
From left to right:Activity Bar and Panels
Clicking an icon in the activity bar opens the matching panel; clicking the same icon again closes it. You can change the panel width by dragging the divider between the panel and the editor.Projects
Lists the files you have open (OPEN PROJECTS). The + button in the header (New Code File) opens a new file, and the × at the end of each row closes that file.Library Manager
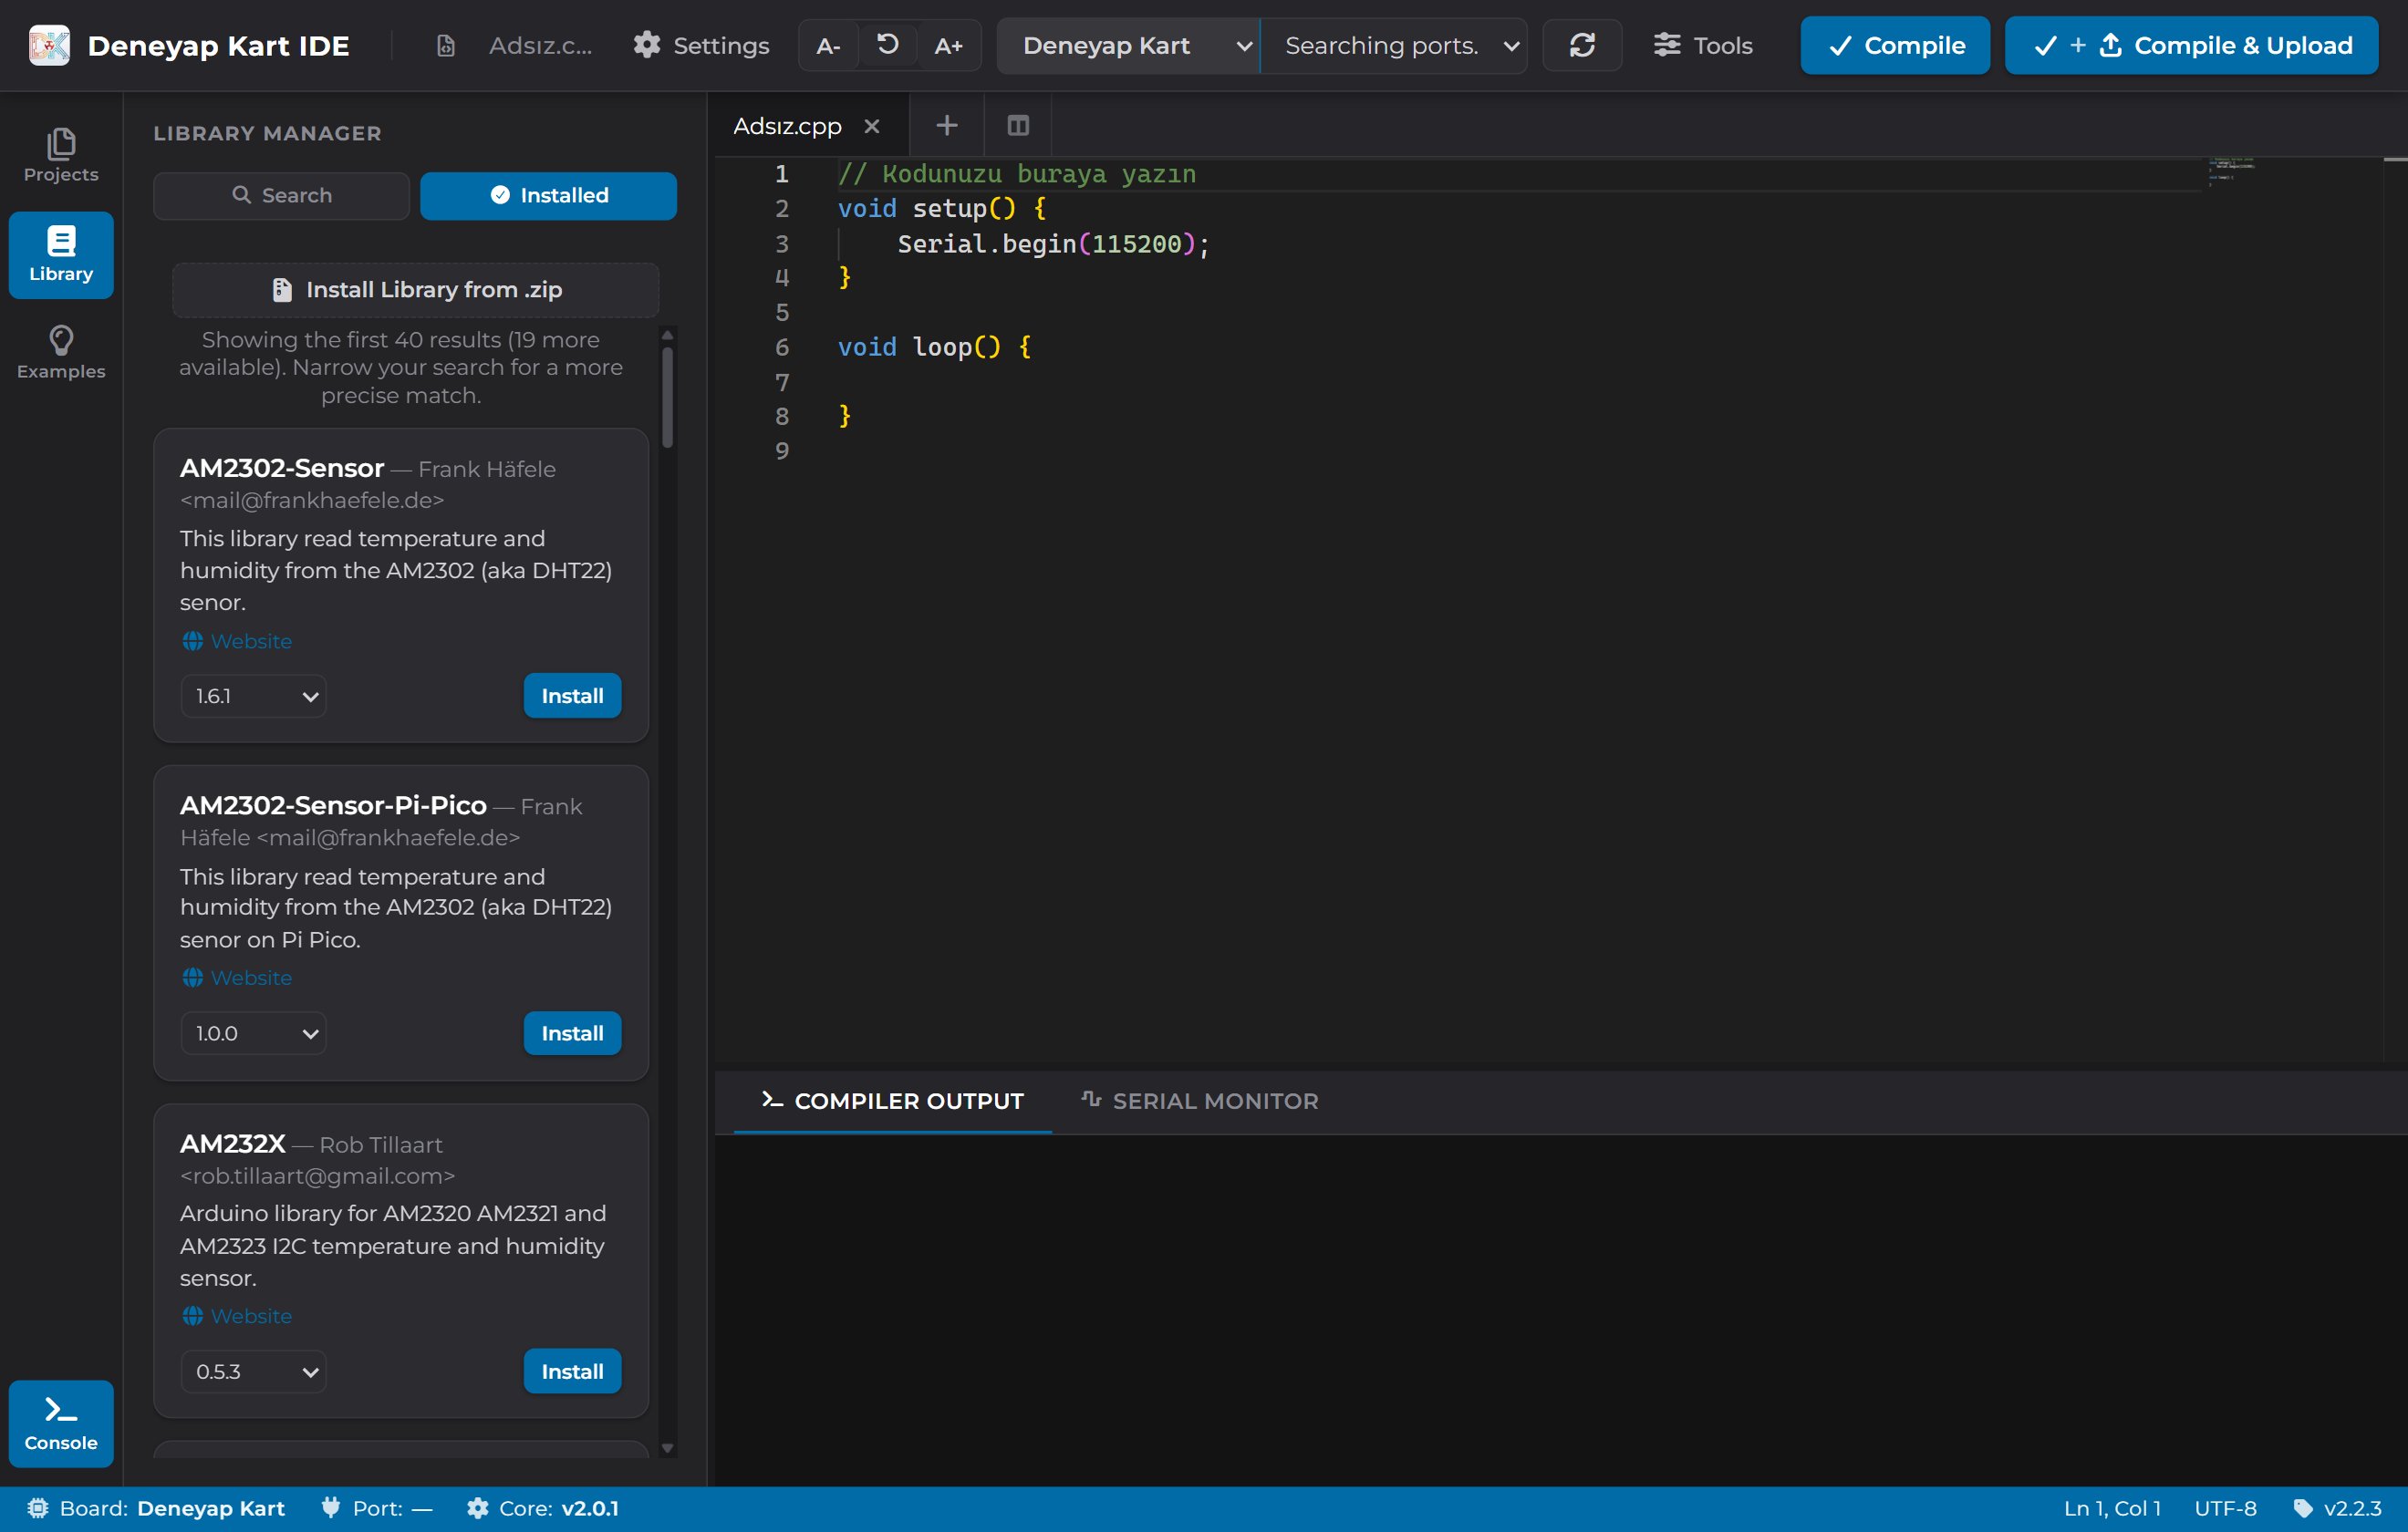
Library Manager
- Search tab: searches the libraries in the Arduino ecosystem. Each result shows the library name, its author, a description, a website link, a version selector and an Install button.
- Installed tab: lists the libraries installed on your computer, where you can remove or update them.
- Install Library from .zip: installs a library from a
.zipfile when it is not available in the Arduino ecosystem.
Library Examples
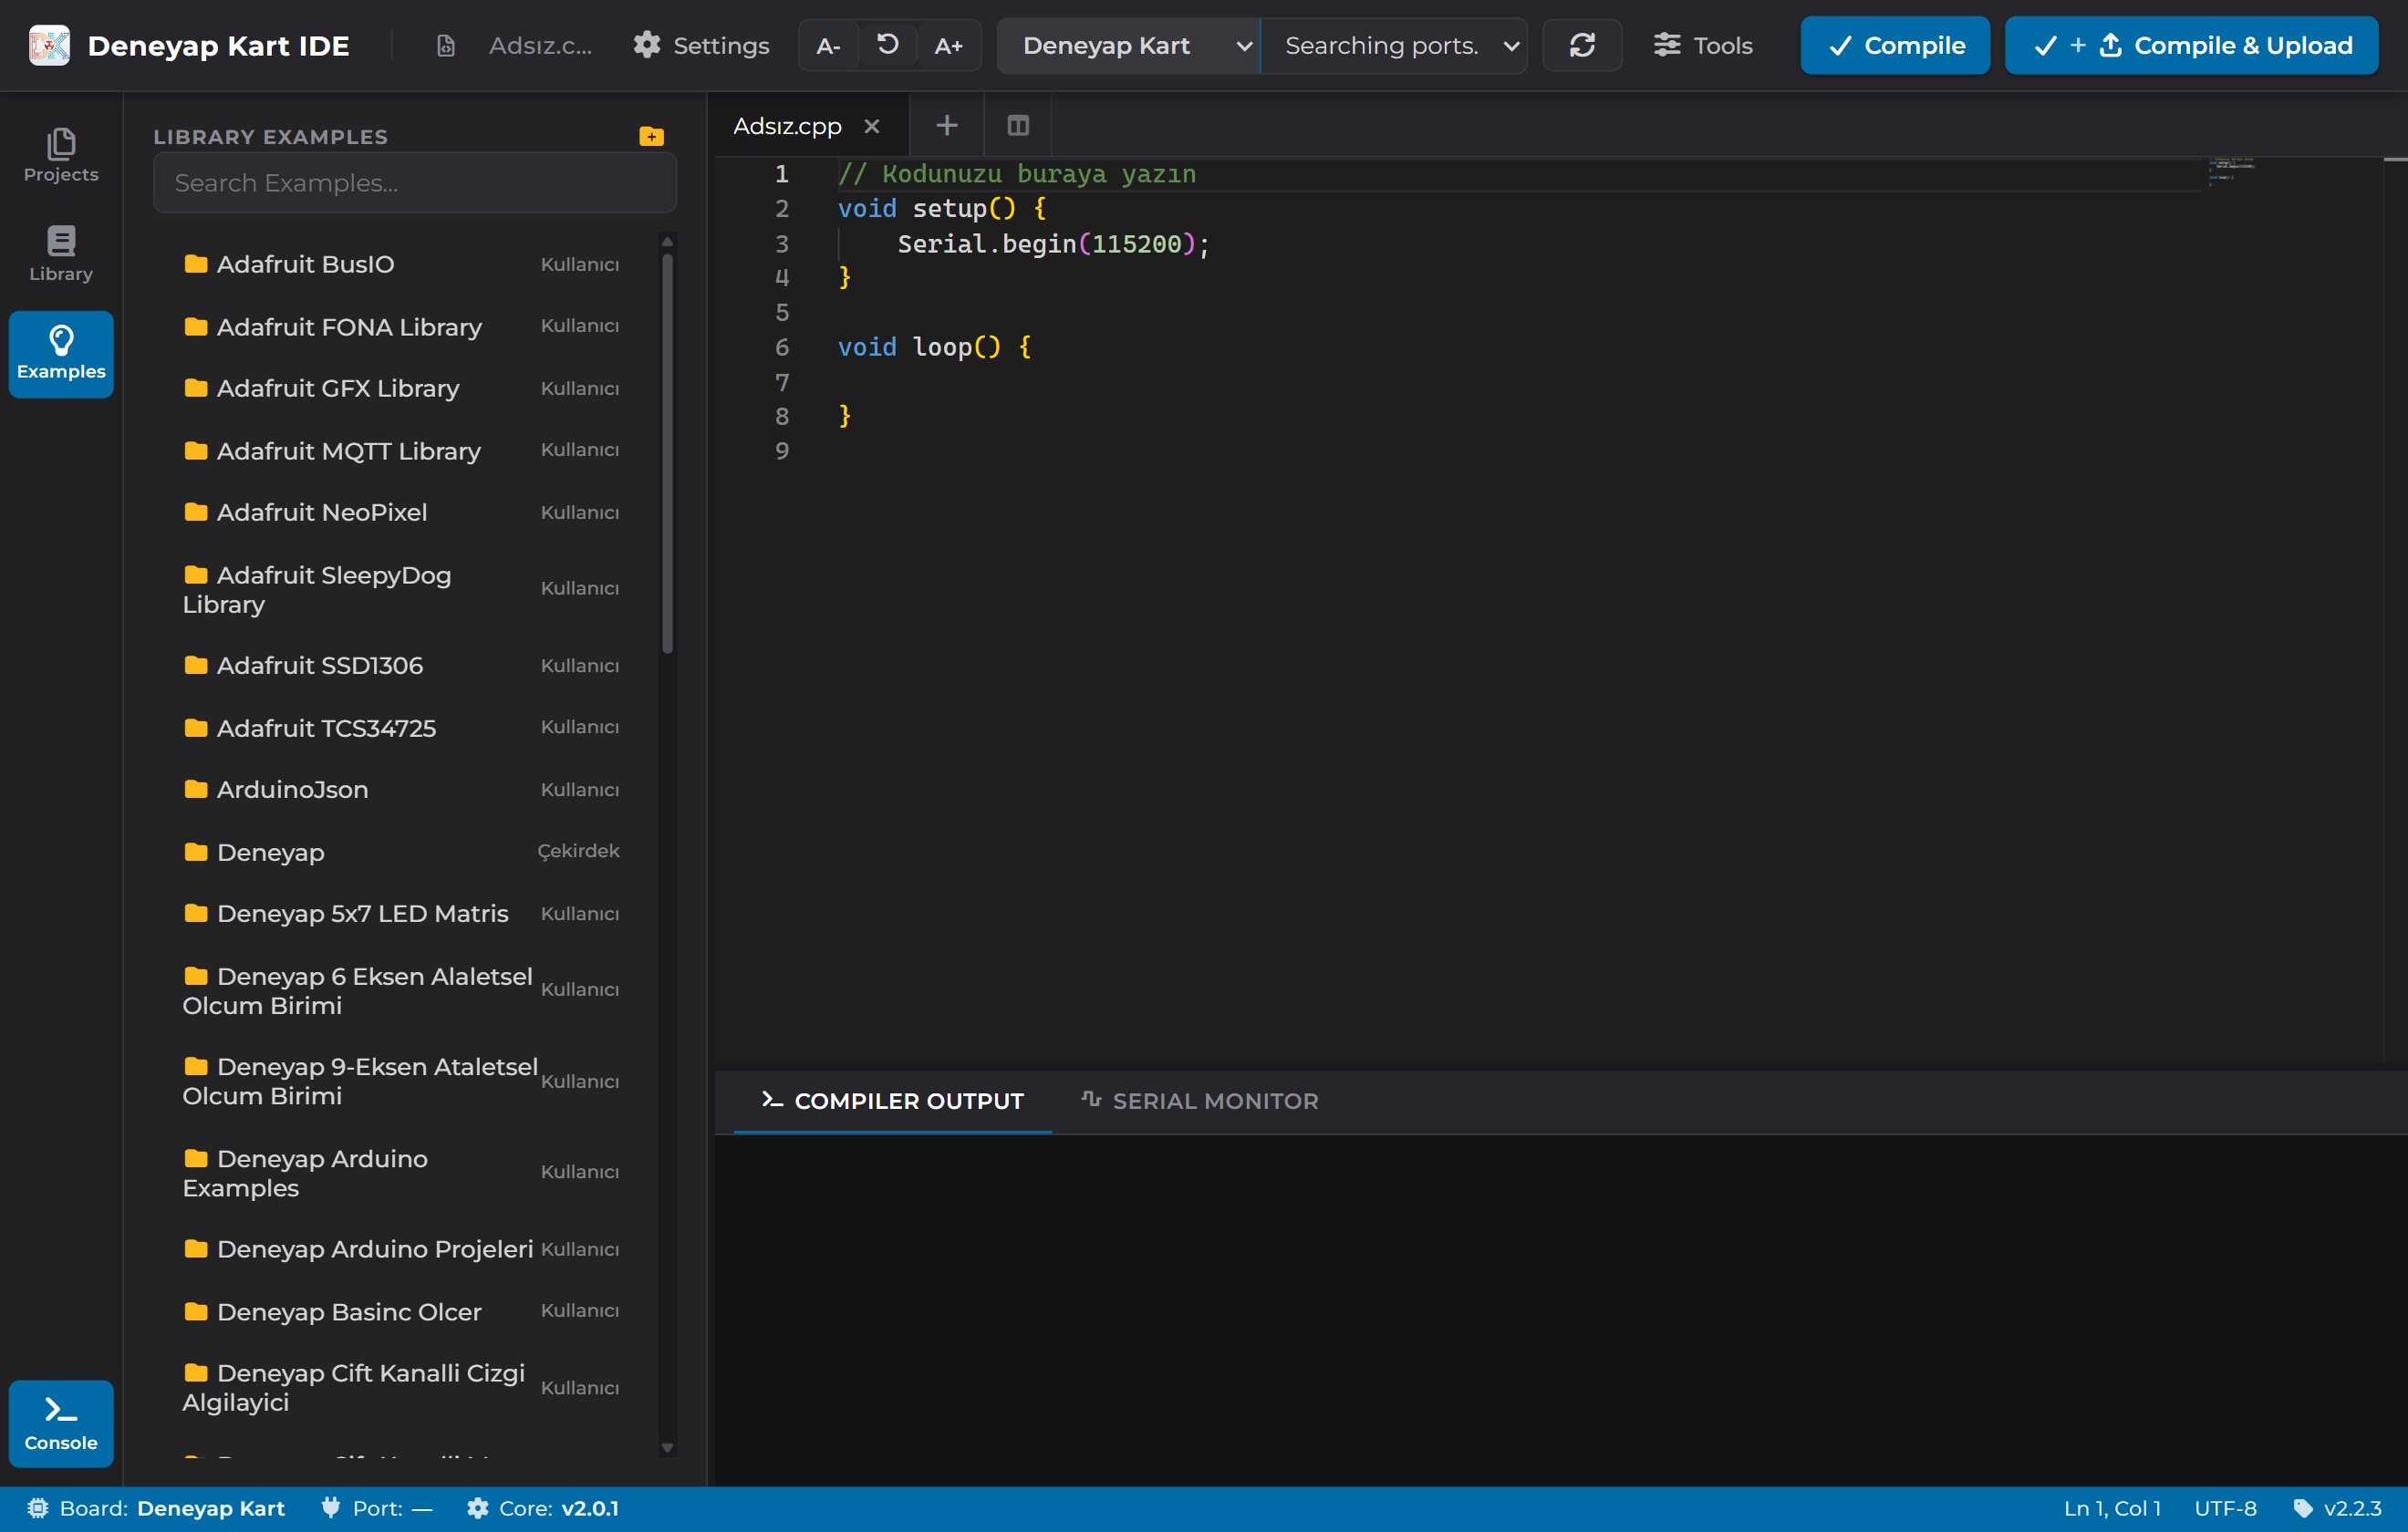
Library Examples Panel
- Core — examples that ship with the Deneyap ESP32 core (WiFi, BLE, Deneyap and so on)
- User — examples from the libraries you installed yourself
- LOCAL — your own example folders, added with the folder button in the header
Editor
The editor is built on Monaco, the same component VS Code uses:- Tabs — you can keep several files open at once. The + in the tab bar opens a new file, and the split icon next to it splits the editor in two so you can view two files side by side.
- Smart code completion — functions from your installed libraries are suggested.
Suggestions are ranked in three tiers: the names you defined in that file first, the
commands of the libraries you
#included next, and everything else last. - Drag and drop — you can open an
.ino/.cppfile by dropping it onto the window. - Font size —
Ctrl+ mouse wheel, or A- / A+ in the toolbar.
Bottom Panel
The Console icon at the bottom of the activity bar hides and shows the bottom panel. You can change its height by dragging the divider above it.Compiler Output
The compiler’s output streams here line by line during builds and uploads. When you get an error, the full error text appears on this tab.Serial Monitor
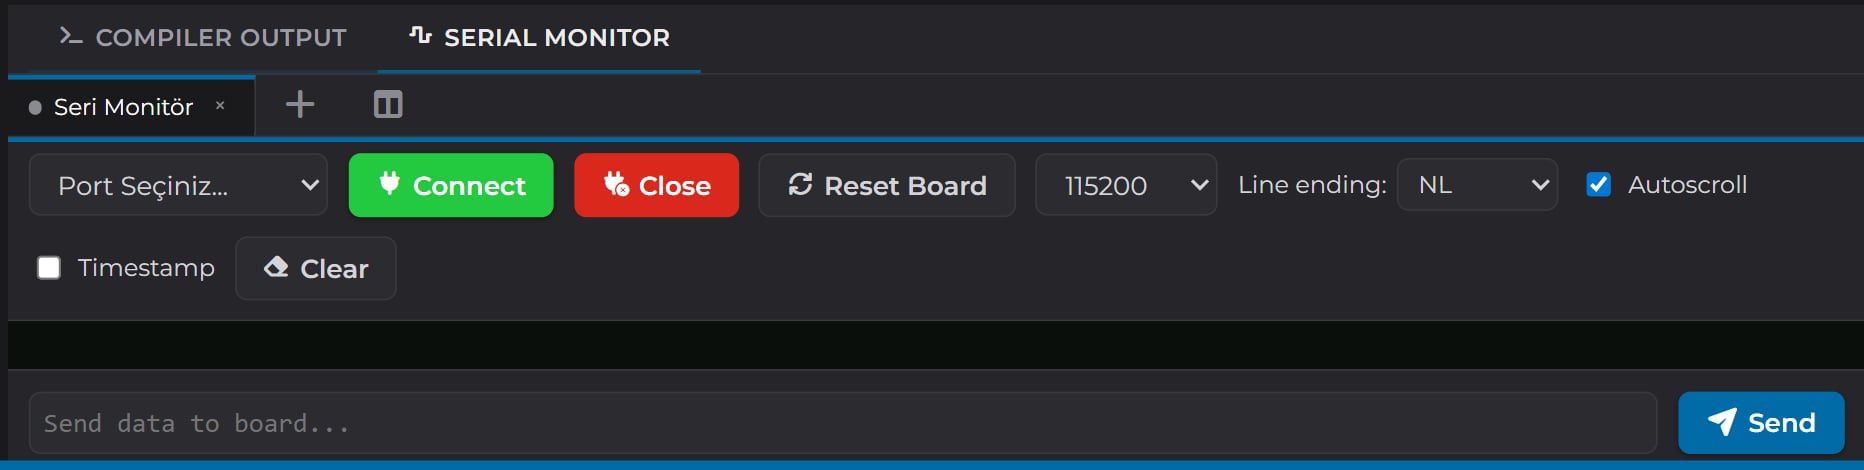
Serial Monitor
Tools Menu
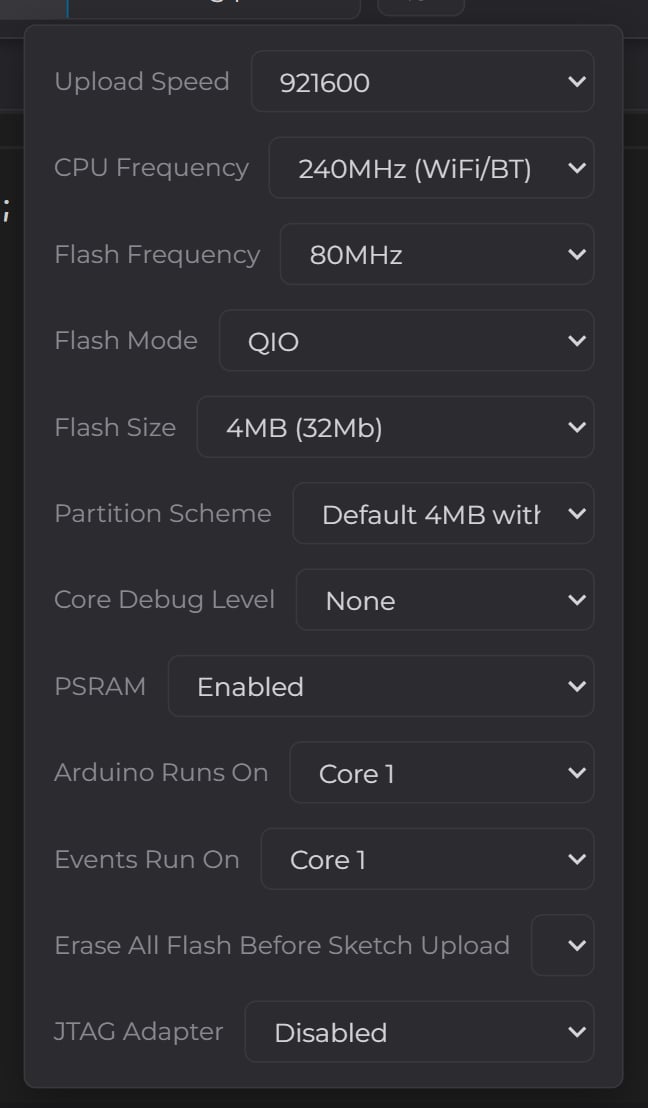
Tools Menu — Board-Specific Build Options
Settings Menu
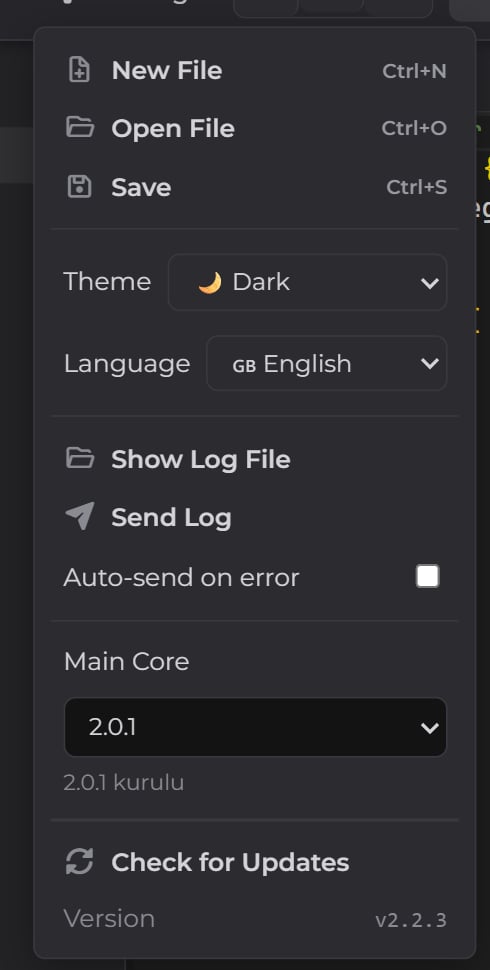
Settings Menu
Status Bar

The Left Side of the Status Bar
- Board — the selected board variation
- Port — the selected port (
—when none is selected) - Core — the installed Deneyap ESP32 core version
- On the right: cursor position (Ln, Col), file encoding (UTF-8) and the IDE version.
Menu Bar and Keyboard Shortcuts
The menu bar at the very top of the window has three headings:Wireless (OTA) Upload
Besides uploading over a cable, Deneyap Kart IDE can also upload over WiFi:- Program the board once over a cable and connect it to your WiFi network.
- The IDE discovers boards on the same network automatically and shows them in the port list under their network name (mDNS name or IP address).
- Select that network address from the port list and press Compile & Upload — the code is sent to the board wirelessly.
What’s Next?
Quick Start
Connect your board and upload your first project.
Errors and Solutions
Common problems and their solutions.