
Download and Installation

To start coding, you must first download and install the latest version of the Arduino IDE compatible with your operating system. After the download is complete, you can proceed with the installation. If you need assistance, select your operating system from the list below to follow the step-by-step installation guide.

Adding Deneyap Kart to the Arduino IDE

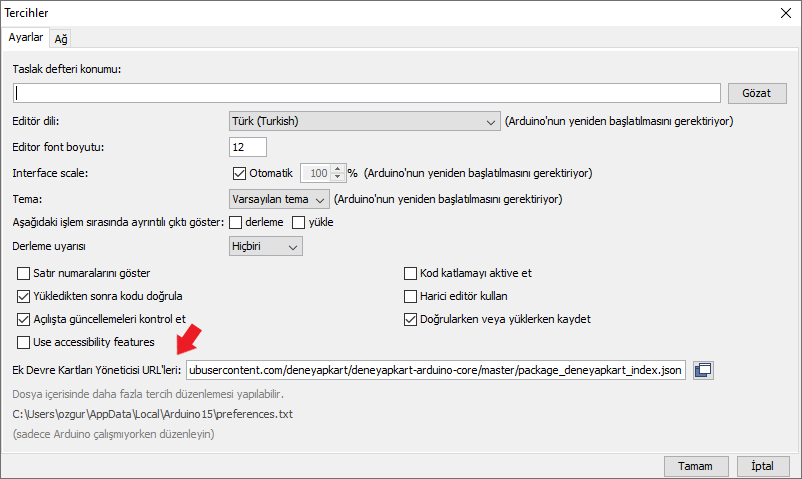
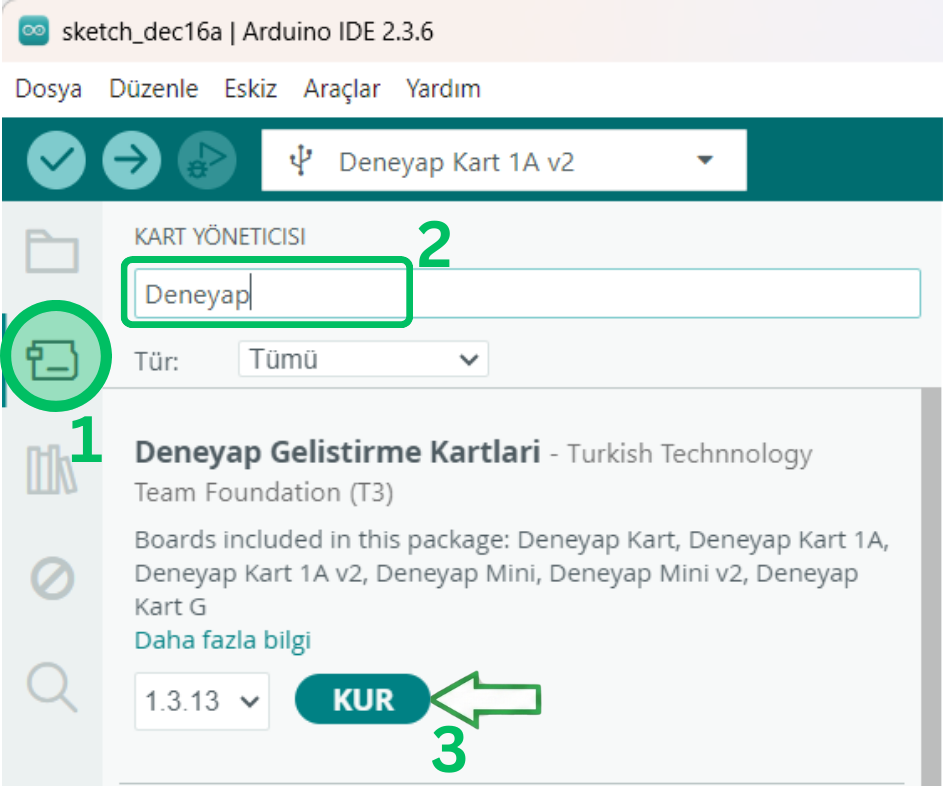
Before starting to code, you must add the Deneyap Kart to the Arduino IDE as described below. In the Arduino IDE, follow File → Preferences. In the window that opens, under the Settings tab, copy the URL of the JSON file provided below into the Additional Boards Manager URLs field.
https://raw.githubusercontent.com/deneyapkart/deneyapkart-arduino-core/master/package_deneyapkart_index.json
Next, follow Tools → Board → Boards Manager. In the search bar on the screen that appears, type “Deneyap Gelistirme Kartlari”. The latest version will be selected by default. Click the Install button to complete the installation.
As the final step, go to Tools → Board, select “Deneyap Kart”, and choose the port to which your board is connected. You can now proceed with coding.
To access example codes, follow File → Examples, then navigate to “Examples for Deneyap Kart”.

USB Driver

By clicking the link below and following the USB driver installation steps, you must install the CP210X driver required for Deneyap Kart and Deneyap Kart 1A boards. For other Deneyap development boards, installing a USB driver is not required.