> ## Documentation Index
> Fetch the complete documentation index at: https://docs.deneyapkart.org/llms.txt
> Use this file to discover all available pages before exploring further.
# Quick Start
> IDE Installation and Overview of Deneyap Kart
In this section, the initial steps required to install the IDE and prepare the DENEYAP Kart development board for development will be explained, and you will be shown how to connect the DENEYAP Kart to your computer. In the following sections of the documentation, the software/hardware development processes and various project examples will be examined.
By the end of this section, you will gain experience in the following topics.
* Downloading and using the DENEYAP Kart IDE application.
* Preparing the DENEYAP Kart by installing the required software.
* Developing your first project by connecting the Deneyap Kart to your computer.
# 1. Installation
By completing the steps listed below under four main headings, the DENEYAP Kart IDE will be made ready for use.
* [Click here to download the DENEYAP Kart IDE installer.](http://cdn.deneyapkart.org/deneyapkartblok/Deneyap_Kart_IDE_4.4.exe)
* Run the DENEYAP Kart IDE after completing the installation.
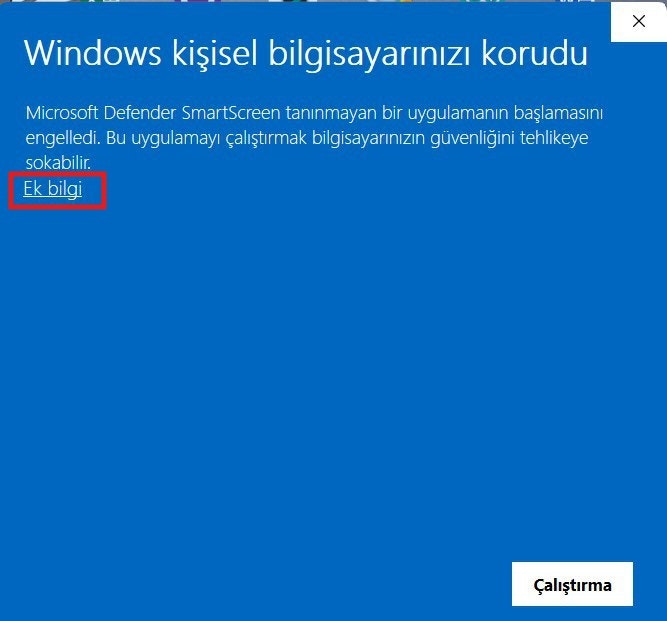 * If this screen appears when you run the installer, first click the **"More info"** button.
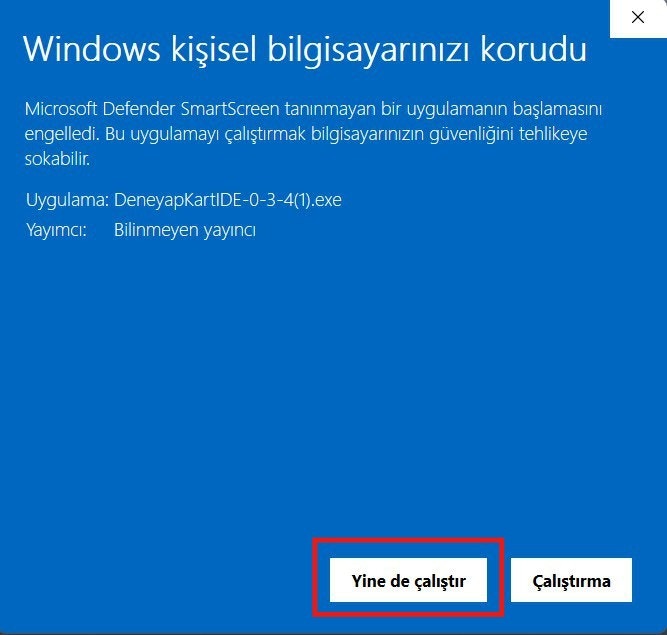 * After clicking the More info button, on this screen you should click **"Run anyway"** and then start the installation process.
* After clicking **"Run anyway"**, complete the installation by clicking **"Next"** in the window that opens.
* On the first launch, the IDE may take some time to open the main screen because it will download the required libraries. After the installation is complete, the main screen will open.
To access the detailed installation with images, [click here.](/en/IDE/Deneyap-Kart-IDE-Setup)
If you encounter any issues during installation, [click here.](/en/IDE/Deneyap-Kart-IDE-Errors-and-Solutions) to access frequently encountered errors and their solutions.
# 2. Coding the DENEYAP Kart
After installing the DENEYAP Kart IDE, the IDE will appear on your screen. The IDE home page looks as shown below.
* After clicking the More info button, on this screen you should click **"Run anyway"** and then start the installation process.
* After clicking **"Run anyway"**, complete the installation by clicking **"Next"** in the window that opens.
* On the first launch, the IDE may take some time to open the main screen because it will download the required libraries. After the installation is complete, the main screen will open.
To access the detailed installation with images, [click here.](/en/IDE/Deneyap-Kart-IDE-Setup)
If you encounter any issues during installation, [click here.](/en/IDE/Deneyap-Kart-IDE-Errors-and-Solutions) to access frequently encountered errors and their solutions.
# 2. Coding the DENEYAP Kart
After installing the DENEYAP Kart IDE, the IDE will appear on your screen. The IDE home page looks as shown below.
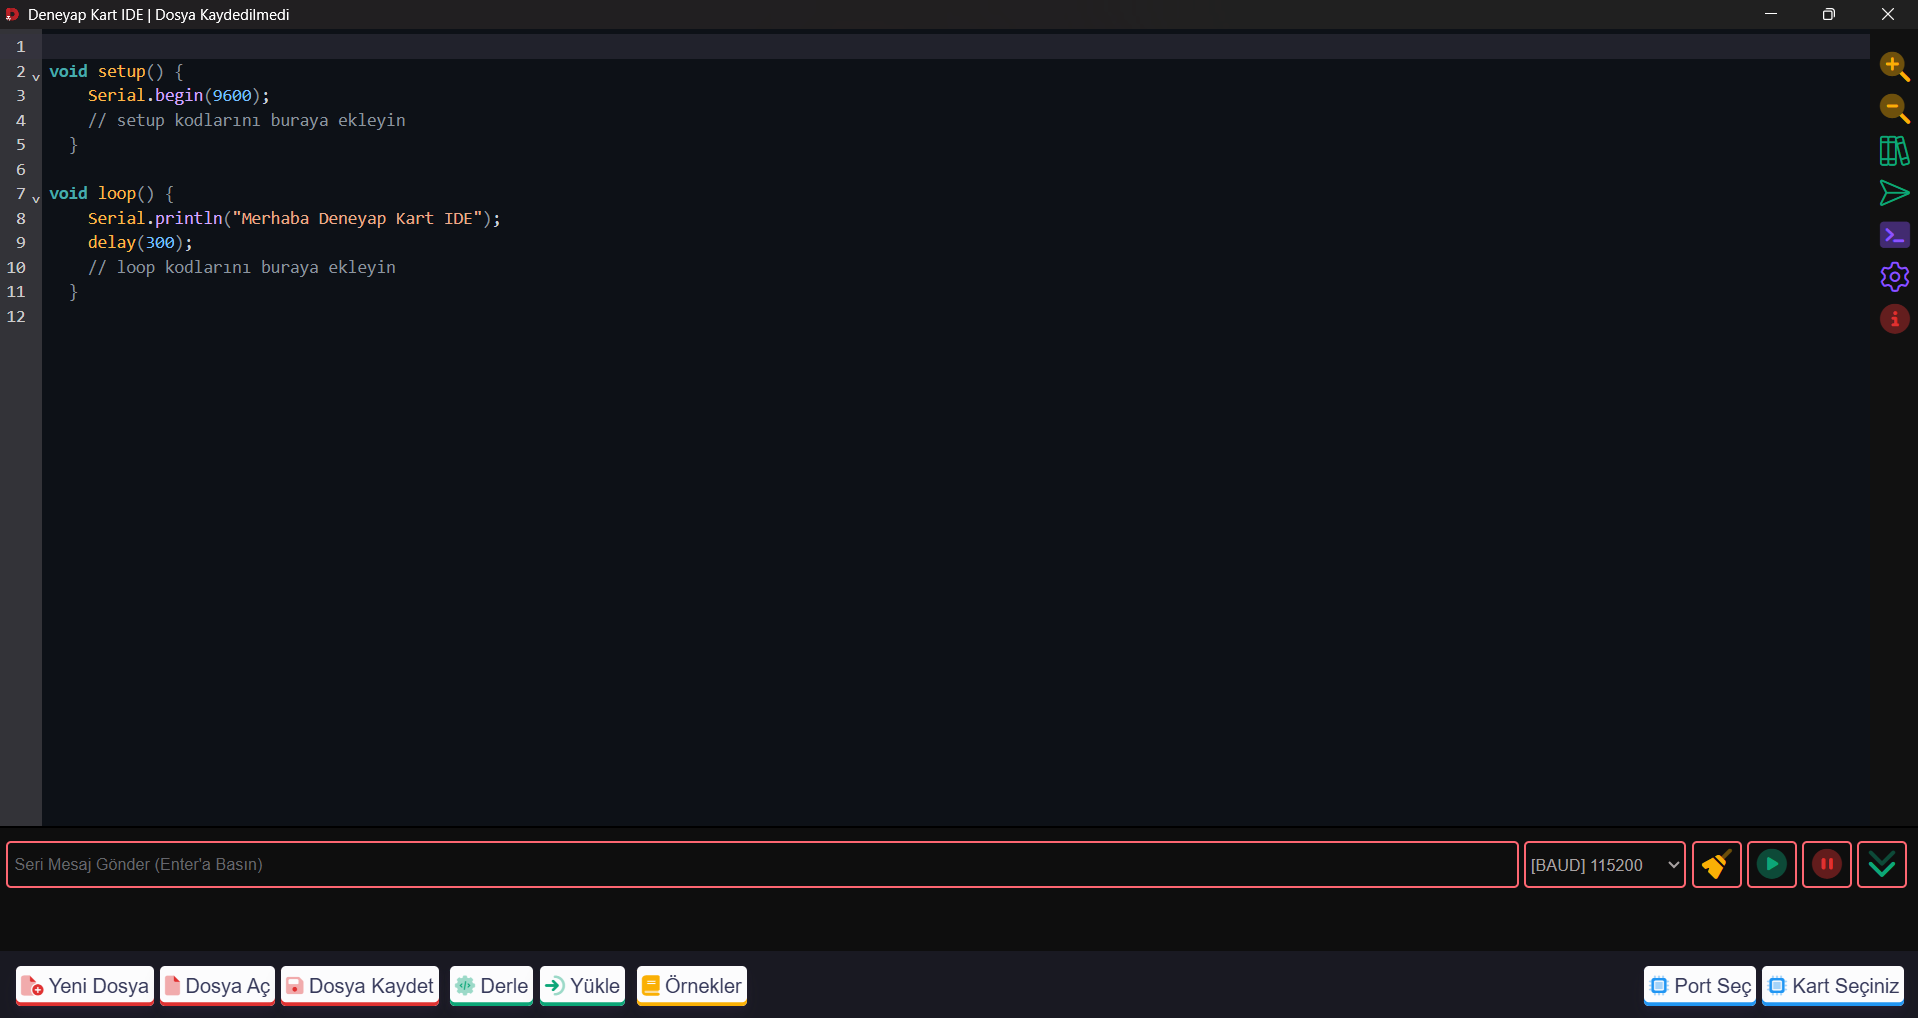 To get started with the DENEYAP Kart, you must select the DENEYAP Kart variation and the Port from the home page. After writing the code for the relevant project, it must be compiled and uploaded to the board. To do this:
 * Click the settings icon from the panel on the right side of the Home Screen.
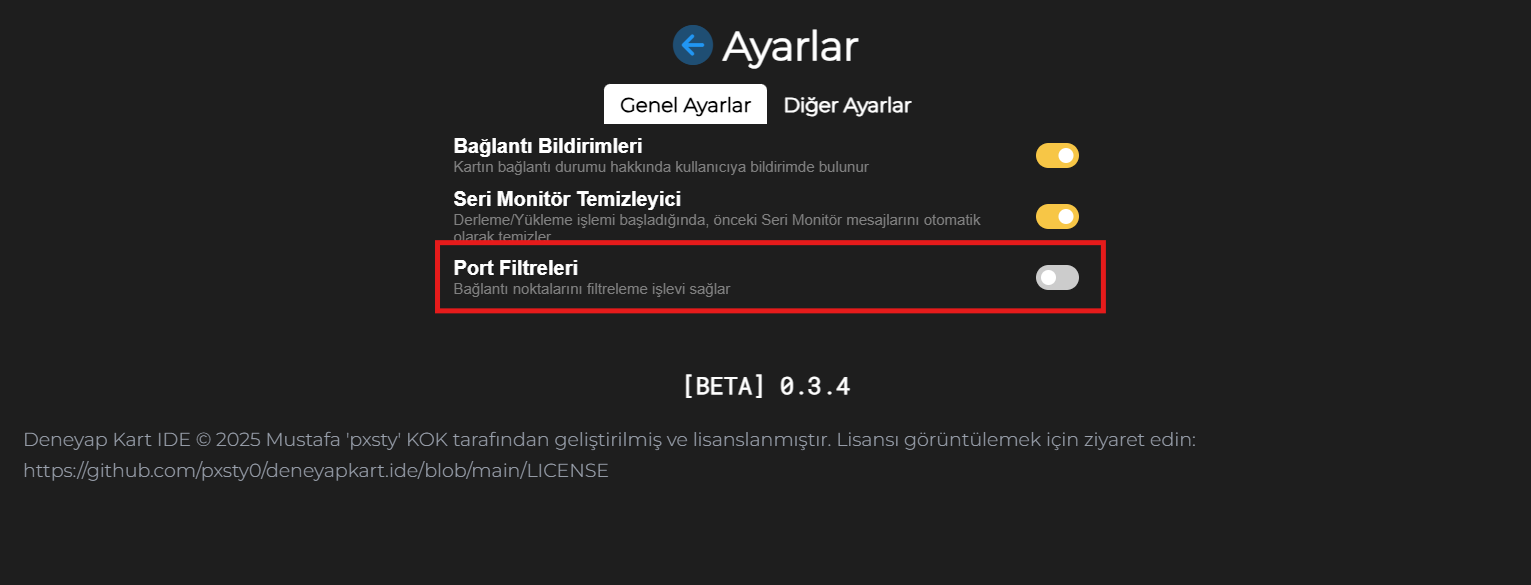 * Enable the **"Port Filtering"** setting marked in red. Then return to the home screen.
 * Make selections in the **"Select Port"** and **"Select Board"** menus respectively.
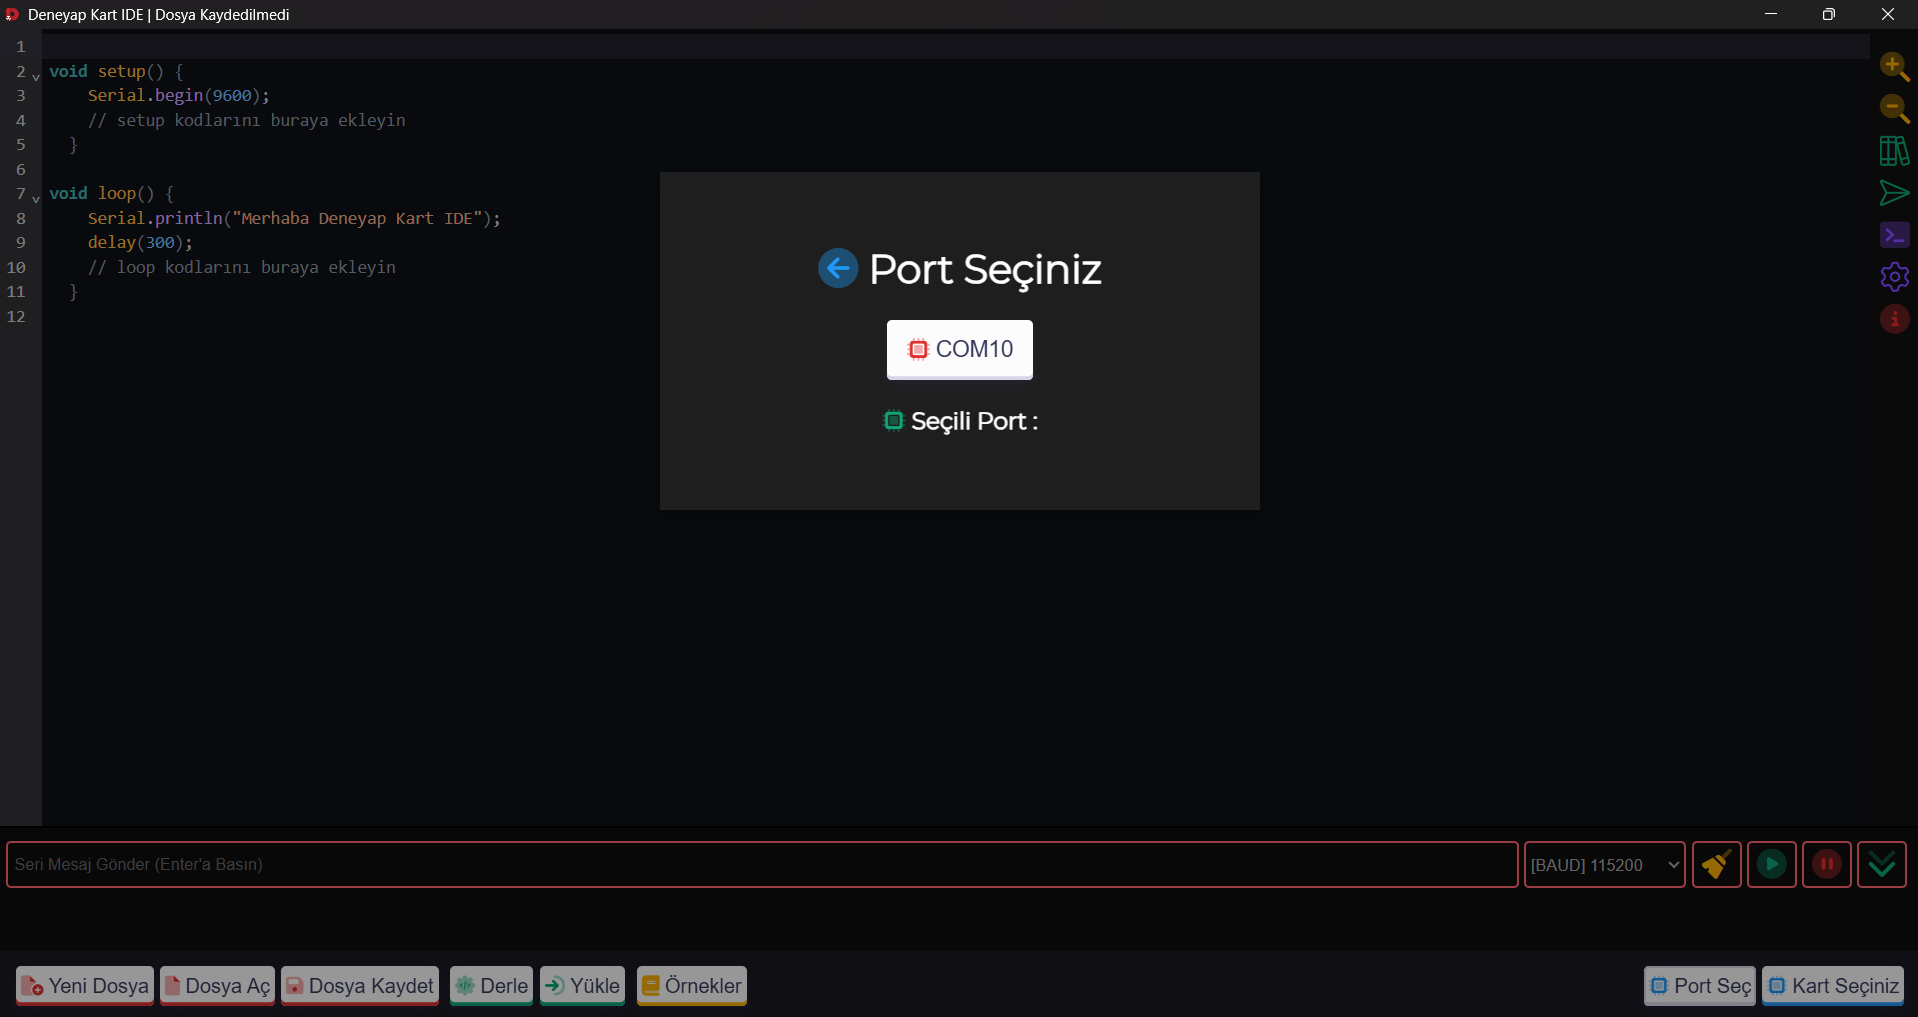 * When you click the **"Select Port"** button, the screen that opens will display the **"COM Port"** information to which your connected DENEYAP Kart variation is attached. Select the relevant COM Port from this screen.
* If no port appears on the **"Select Port"** screen after you connect your board to your computer with a connection cable, you can click [here](/en/FAQ) to find the solution and continue from where you left off.
* When you click the **"Select Port"** button, the screen that opens will display the **"COM Port"** information to which your connected DENEYAP Kart variation is attached. Select the relevant COM Port from this screen.
* If no port appears on the **"Select Port"** screen after you connect your board to your computer with a connection cable, you can click [here](/en/FAQ) to find the solution and continue from where you left off.
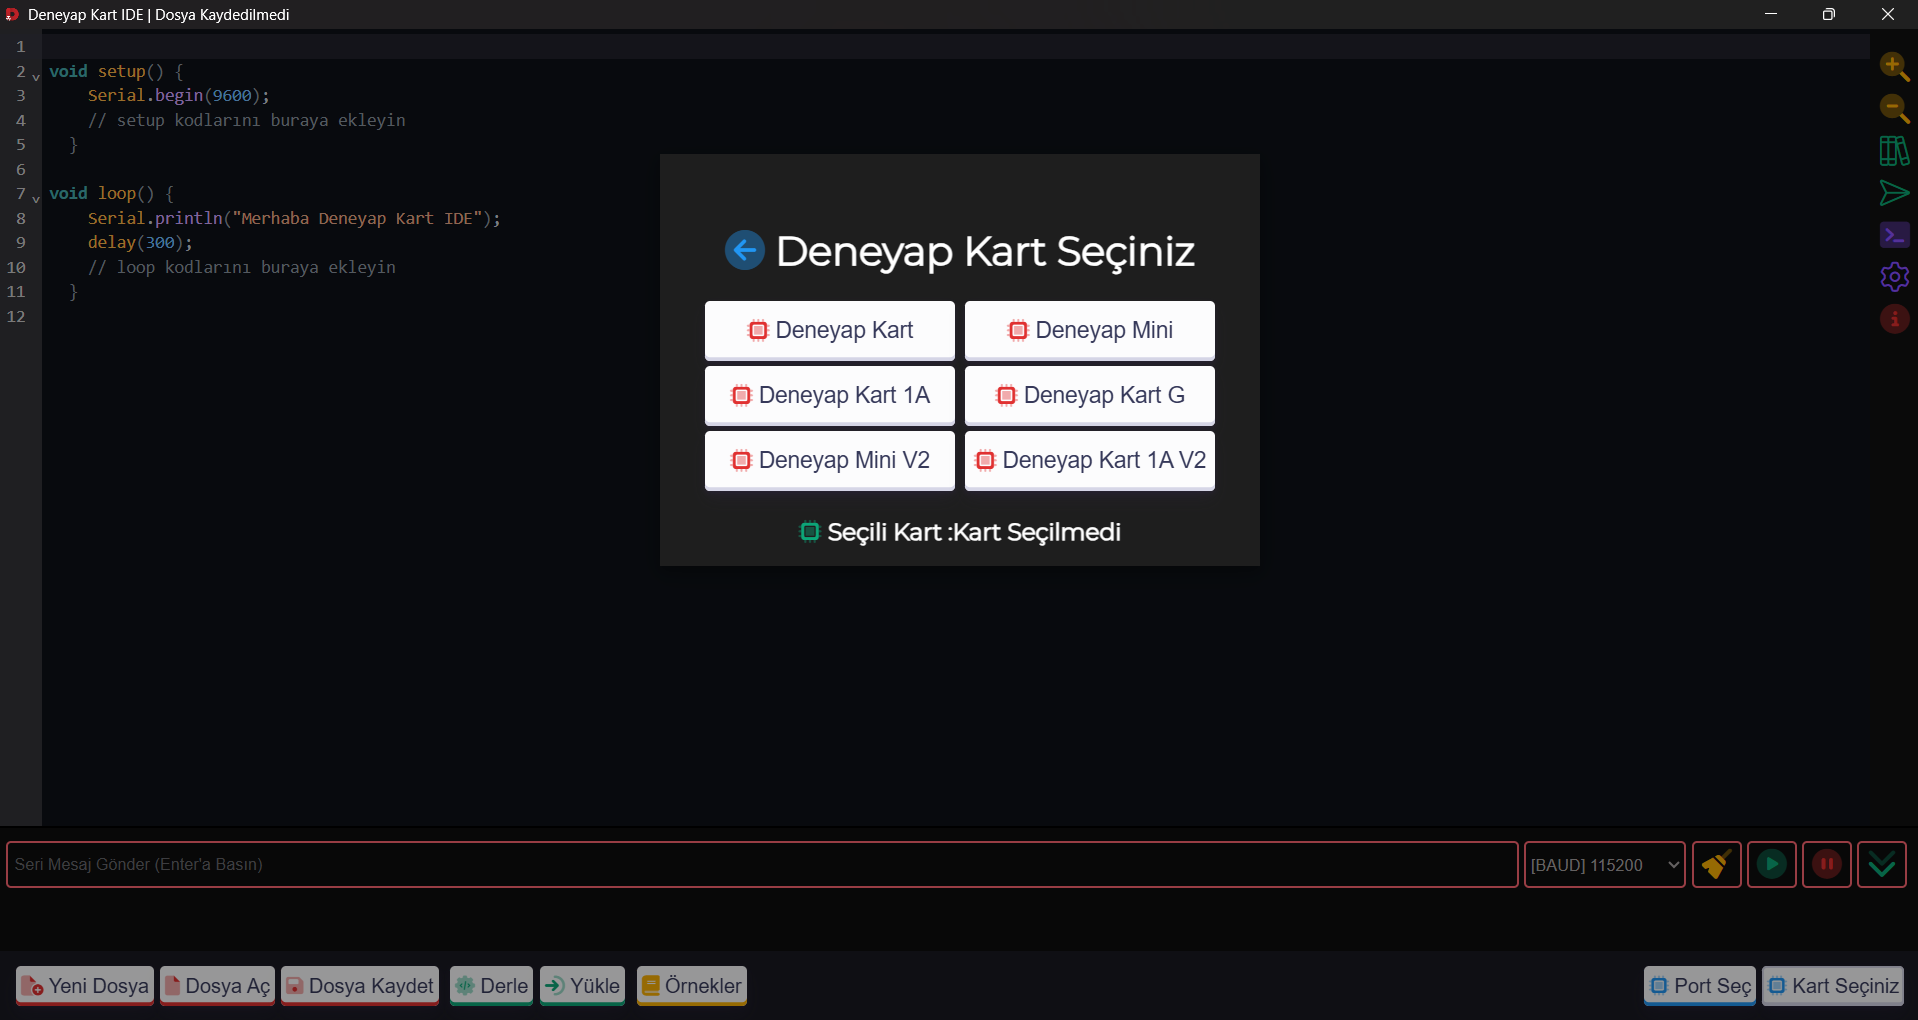 * After completing the port selection, close the window that opened and click the **"Select Board"** button. Choose the DENEYAP Kart variation on the screen that matches your board.
 * After selecting the correct Port and Board and returning to the home screen, the **"Select Port"** and **"Select Board"** buttons in the bottom-right corner of the screen should be green.
 * After completing the Port and Board selection, write your project code, then click the **"Compile"** button to confirm that the code compiles successfully, and then click the **"Upload"** button to confirm that it uploads successfully.
* If you encounter an error during uploading, you can click [here](/en/FAQ) to visit the **"Frequently Asked Questions"** page to find the solution and continue from where you left off.
* Using the **"Examples"** button in the same section, you can try pre-written code examples. To access examples by level, you can click [here](/en/projects/Beginner).
# 3. You're Ready
* You are now ready to develop with the DENEYAP Kart! You can click [here](/en/projects/Beginner) to access examples by level, and click [here](https://deneyapkart.org/projeler/tum-projeler) to access all examples related to DENEYAP Kart.
* Happy coding!
* After completing the Port and Board selection, write your project code, then click the **"Compile"** button to confirm that the code compiles successfully, and then click the **"Upload"** button to confirm that it uploads successfully.
* If you encounter an error during uploading, you can click [here](/en/FAQ) to visit the **"Frequently Asked Questions"** page to find the solution and continue from where you left off.
* Using the **"Examples"** button in the same section, you can try pre-written code examples. To access examples by level, you can click [here](/en/projects/Beginner).
# 3. You're Ready
* You are now ready to develop with the DENEYAP Kart! You can click [here](/en/projects/Beginner) to access examples by level, and click [here](https://deneyapkart.org/projeler/tum-projeler) to access all examples related to DENEYAP Kart.
* Happy coding!