> ## Documentation Index
> Fetch the complete documentation index at: https://docs.deneyapkart.org/llms.txt
> Use this file to discover all available pages before exploring further.
# First Application with Deneyap Mini in Deneyap Kart Blok
* In this example, we will use the Deneyap Blok coding platform to turn the RGB LED on the Deneyap Mini board **red**.
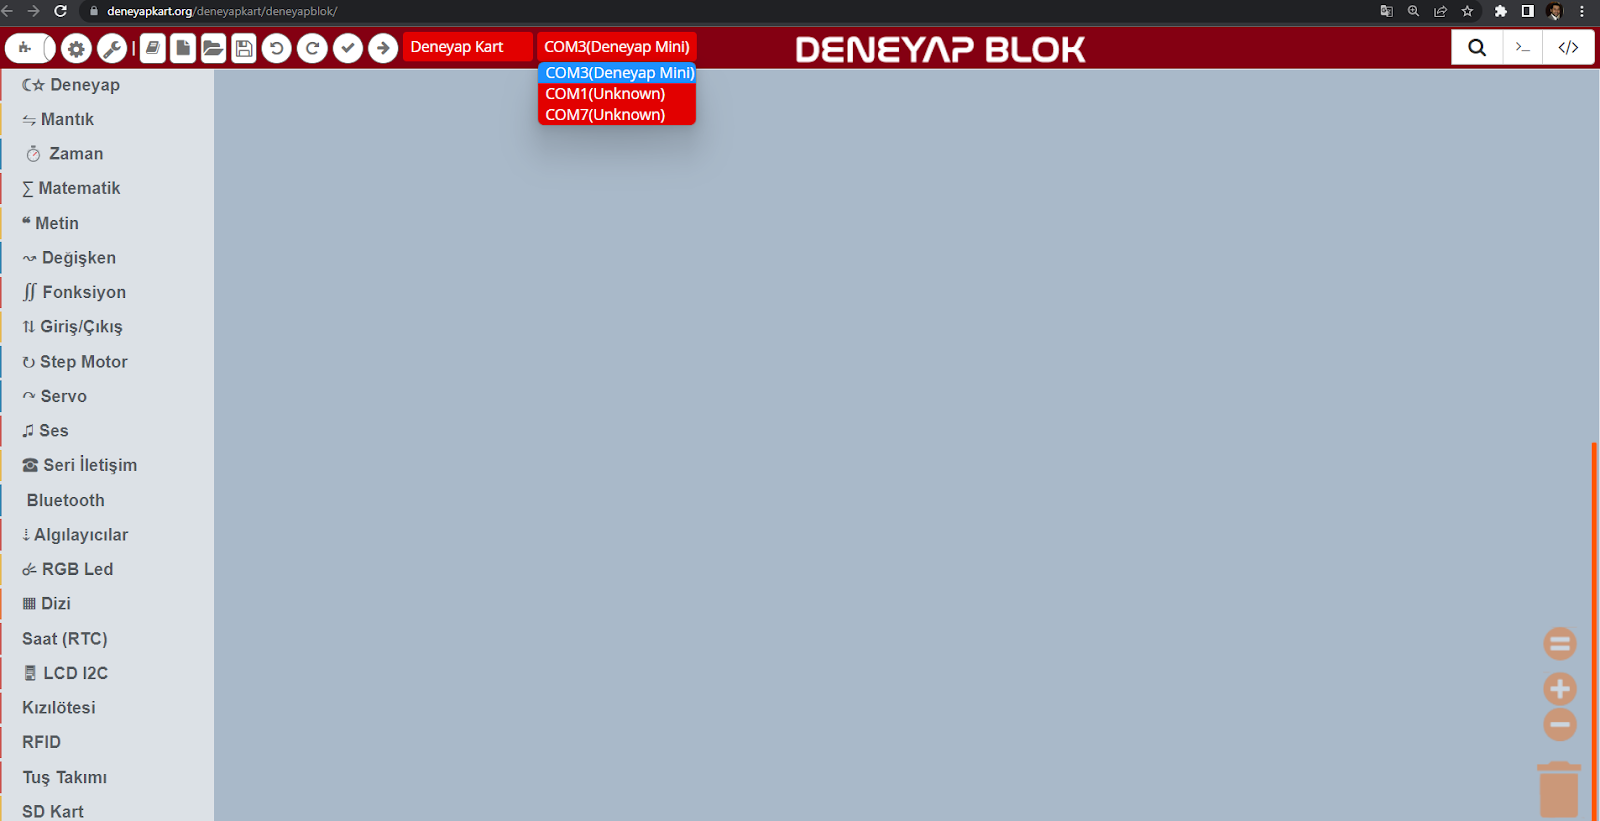
* From the top menu, we select the board. In this example, **Deneyap Mini** is selected.
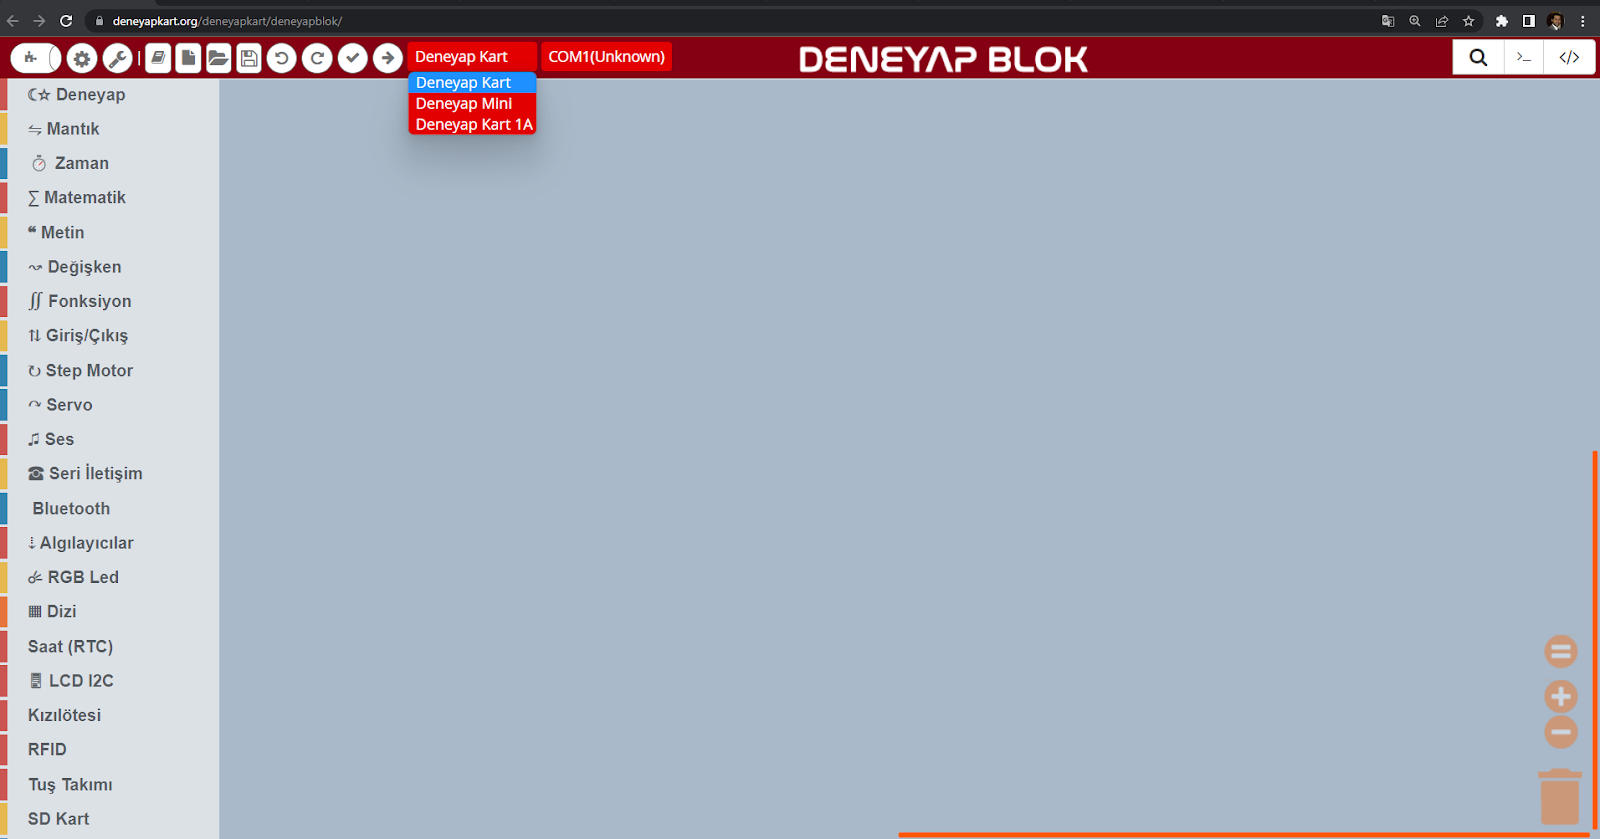 * After selecting the board, we choose the port to which the Deneyap Mini is connected.
 * Block selections are made from the menu on the left. From the **“Input/Output”** category, we select the command **“use digital pin … at …”**.
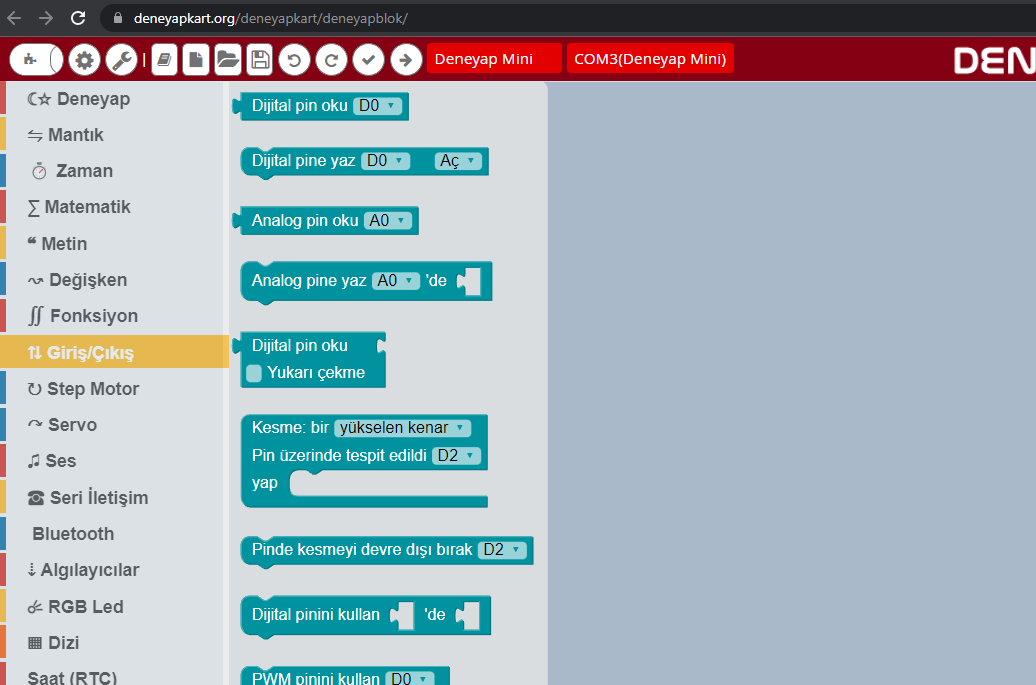 * This command allows us to send a digital value to a pin. One field in the block is used to specify the pin, and the second field is used to specify the value.
 * Next, from the **“Math”** category, we select the **“A1”** block. This block is used to define the pin name.
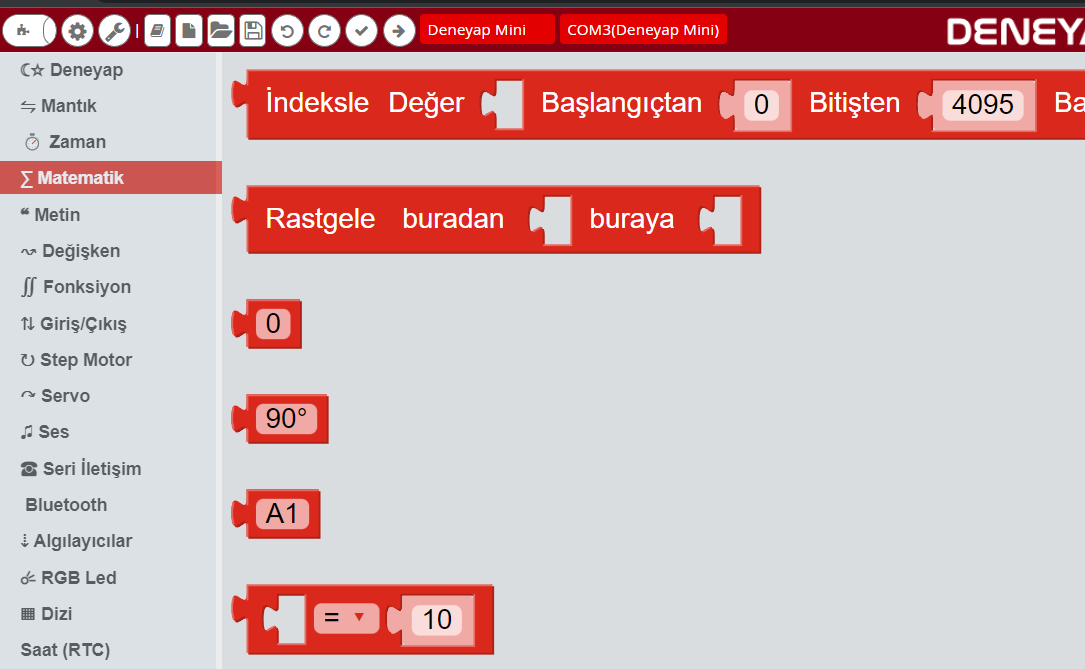 * For the red LED, we update the field labeled **“A1”** to **“LEDR”** and place it into the relevant slot of the **“use digital pin … at …”** command as shown below.
 * From the menu, we select the **“1 (HIGH)”** block located in the **“Logic”** category. This block allows us to send a **1 (ON)** or **0 (OFF)** command to a pin.
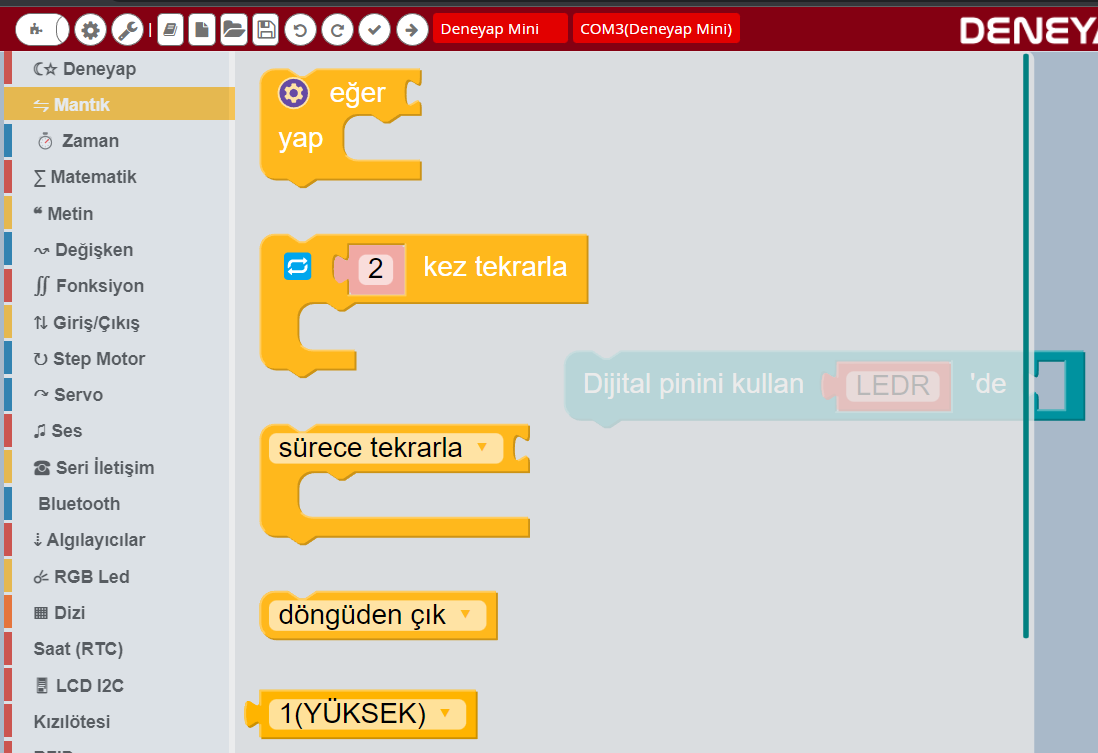 * We place this block into the appropriate field of the **“use digital pin … at …”** command as shown below.
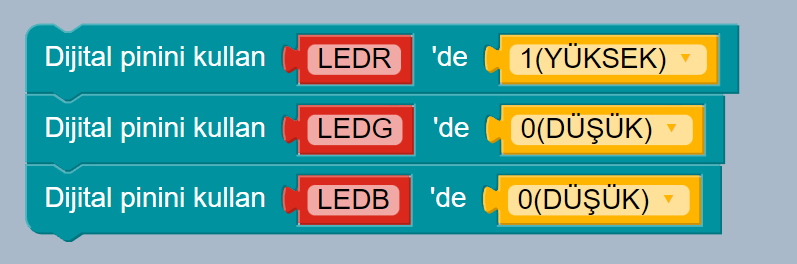
 * We repeat this process for the green (**LEDG**) and blue (**LEDB**) LEDs as shown below. For convenience, we right-click on the block and use the **duplicate** option.
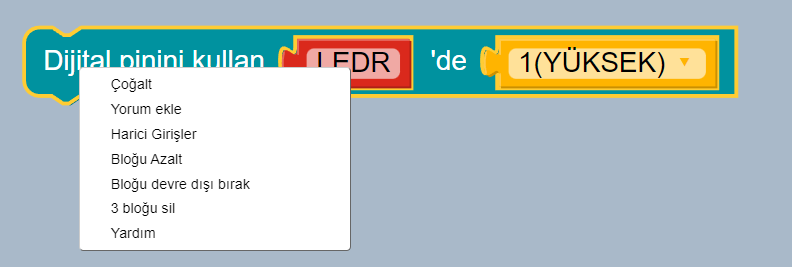 * After duplicating, we connect the blocks sequentially and update the pin names and values accordingly.
 * By clicking the **“Upload”** icon shown below, we upload the code to the Deneyap Mini board.
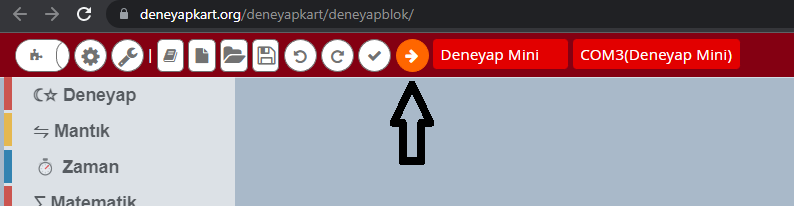 * The upload process can be monitored from the panel that opens on the right side.
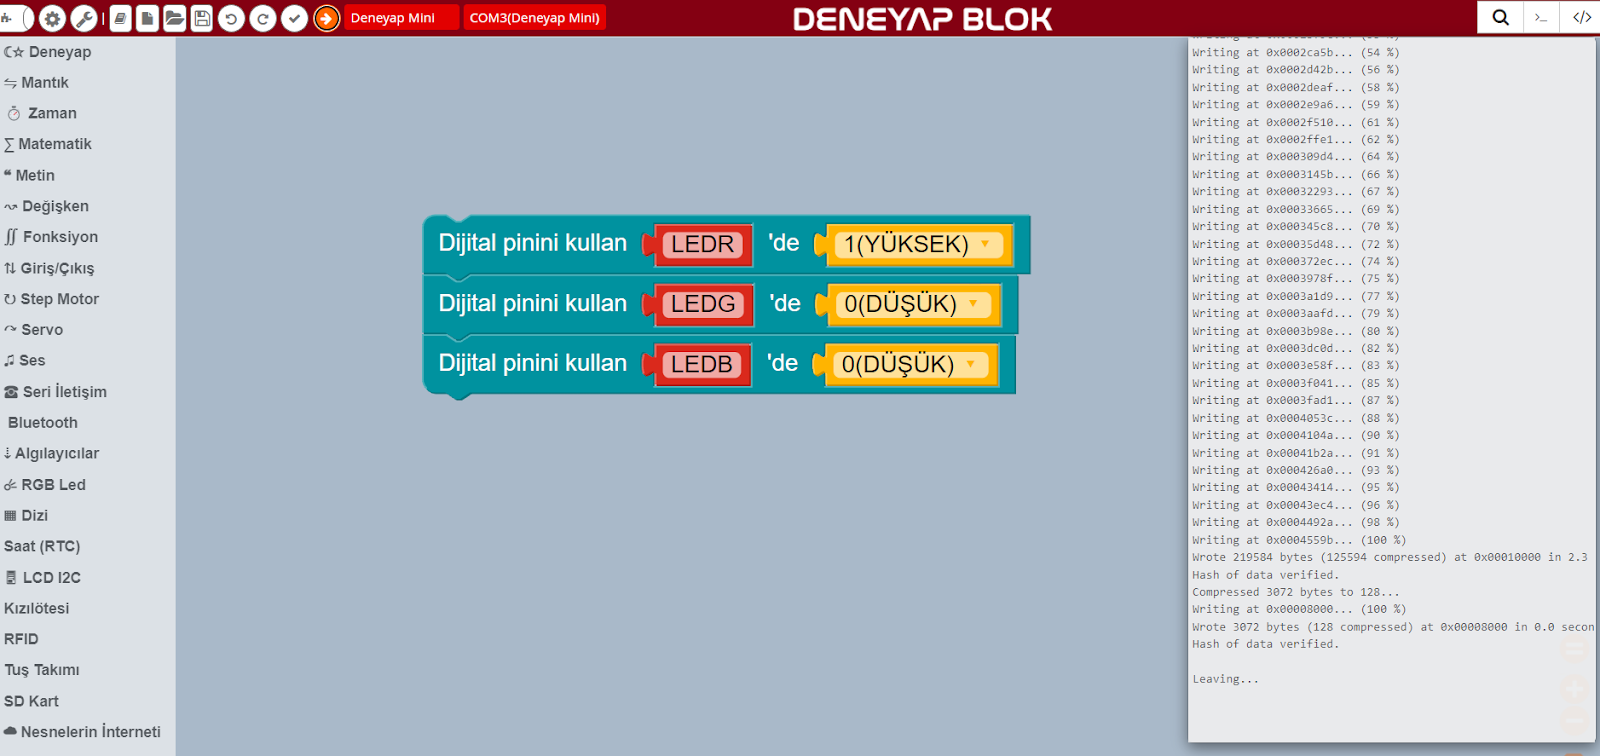 * As a result, the LED on the Deneyap Mini board lights up **red**.