> ## Documentation Index
> Fetch the complete documentation index at: https://docs.deneyapkart.org/llms.txt
> Use this file to discover all available pages before exploring further.
# Programming with Arduino IDE
## Download and Installation
To start coding, you must first download and install the latest version of the Arduino IDE compatible with your operating system.
[Click here to go to the Arduino IDE download page.](https://www.arduino.cc/en/software/)
After the download is complete, you can proceed with the installation. If you need assistance, select your operating system from the list below to follow the step-by-step installation guide.
[Windows](https://www.arduino.cc/en/Guide/Windows) | [macOS](https://www.arduino.cc/en/Guide/MacOSX) | [Linux](https://www.arduino.cc/en/Guide/Linux)
## Adding Deneyap Kart to the Arduino IDE
Before starting to code, you must add the Deneyap Kart to the Arduino IDE as described below.
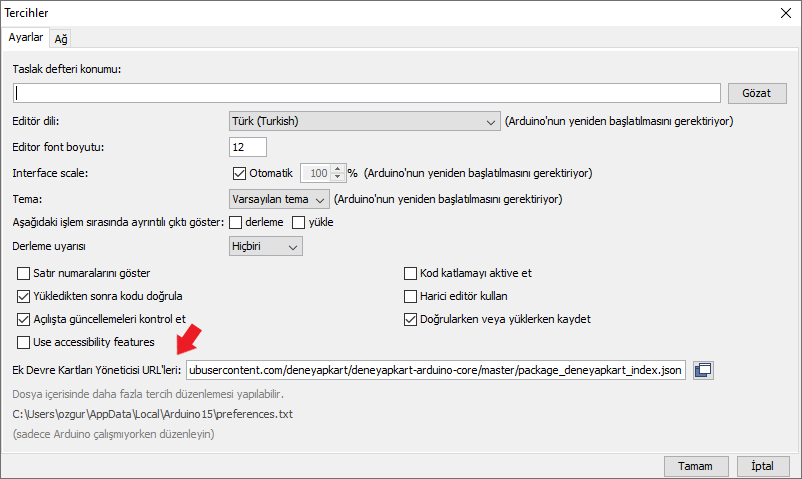
In the Arduino IDE, follow **File → Preferences**. In the window that opens, under the **Settings** tab, copy the URL of the JSON file provided below into the **Additional Boards Manager URLs** field.
```bash theme={null}
https://raw.githubusercontent.com/deneyapkart/deneyapkart-arduino-core/master/package_deneyapkart_index.json
```
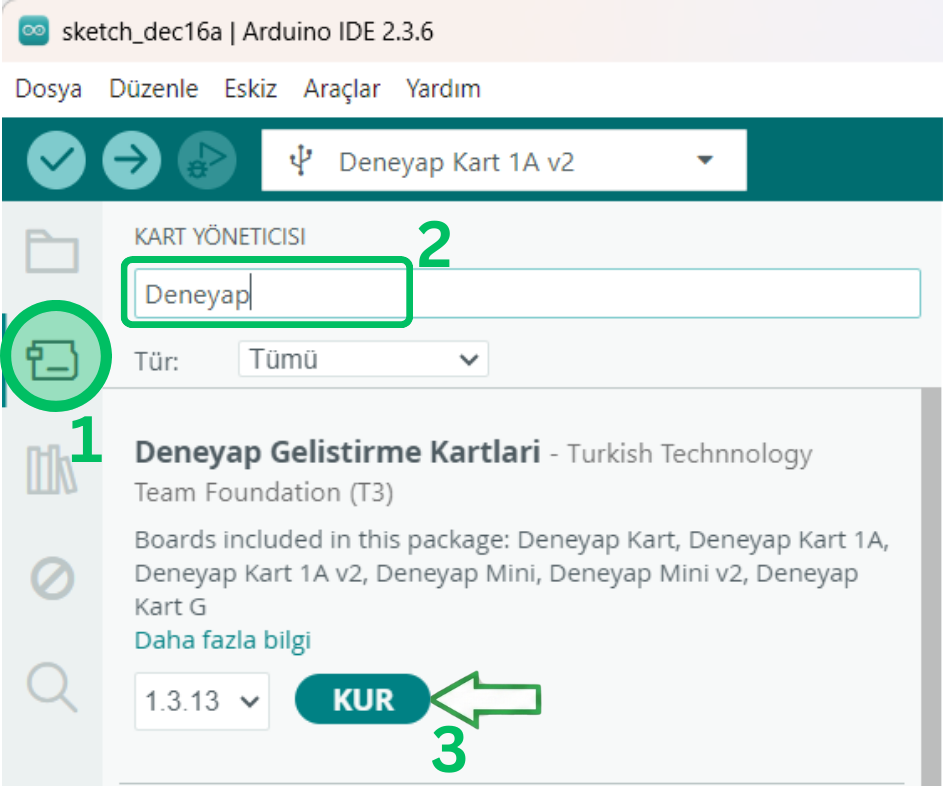
 Next, follow **Tools → Board → Boards Manager**. In the search bar on the screen that appears, type **“Deneyap Gelistirme Kartlari”**. The latest version will be selected by default. Click the **Install** button to complete the installation.
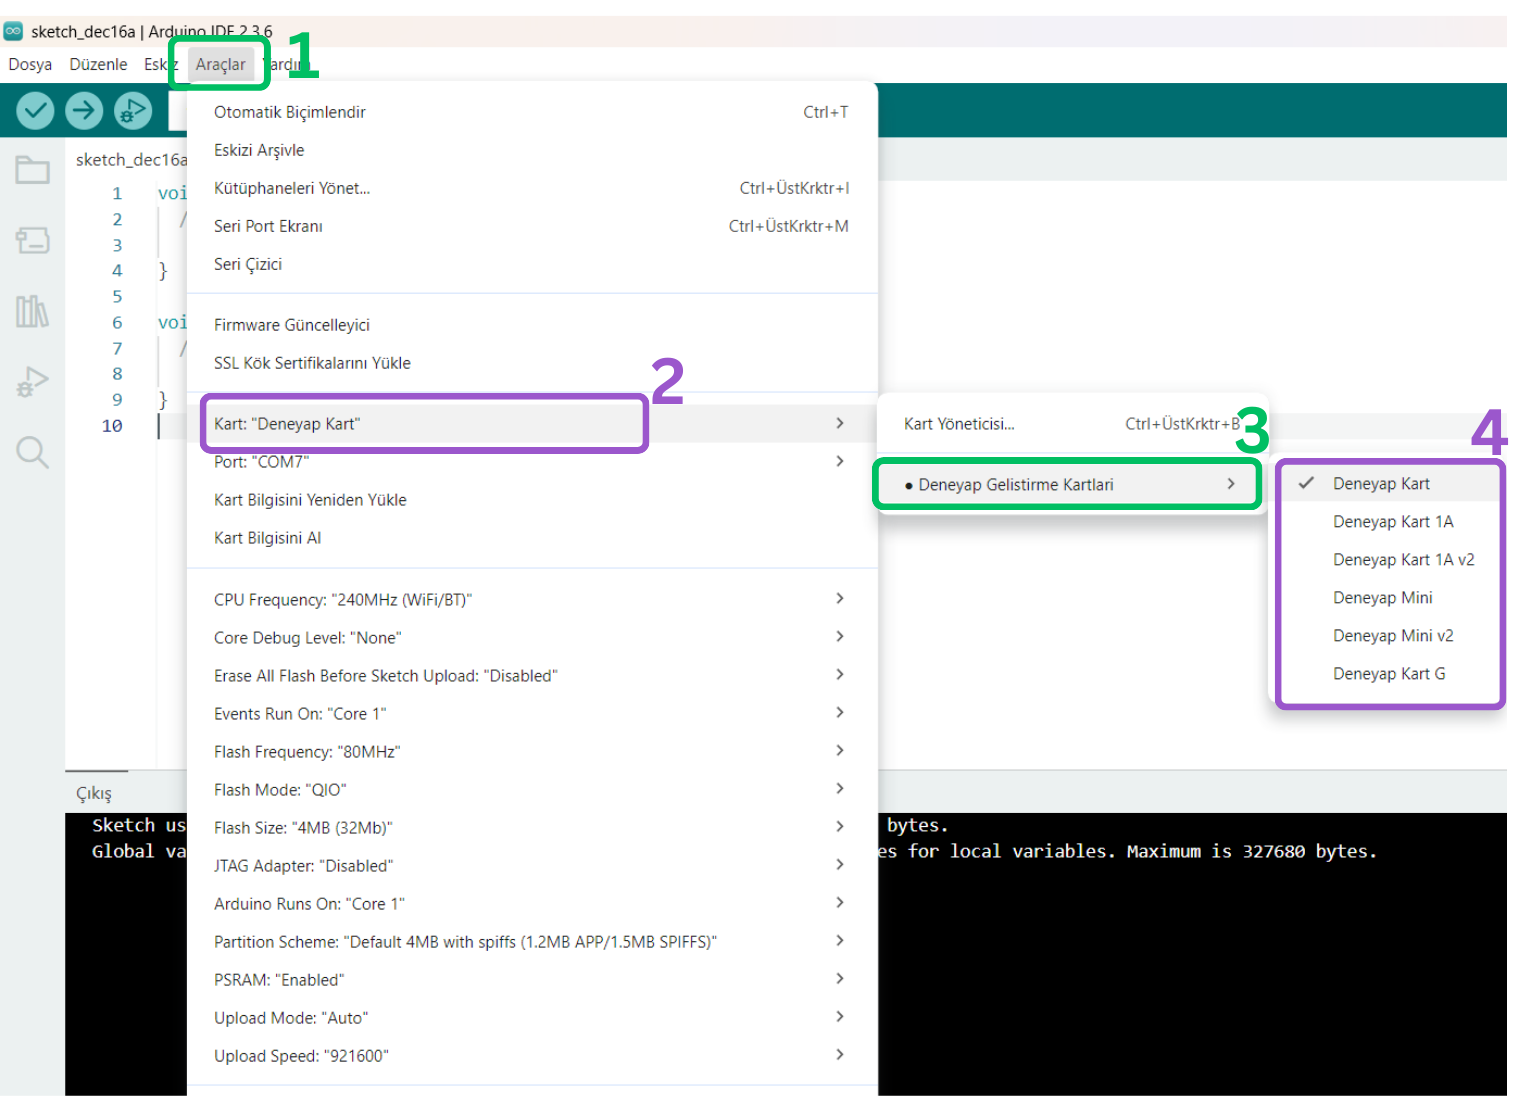
 As the final step, go to **Tools → Board**, select **“Deneyap Kart”**, and choose the port to which your board is connected. You can now proceed with coding.
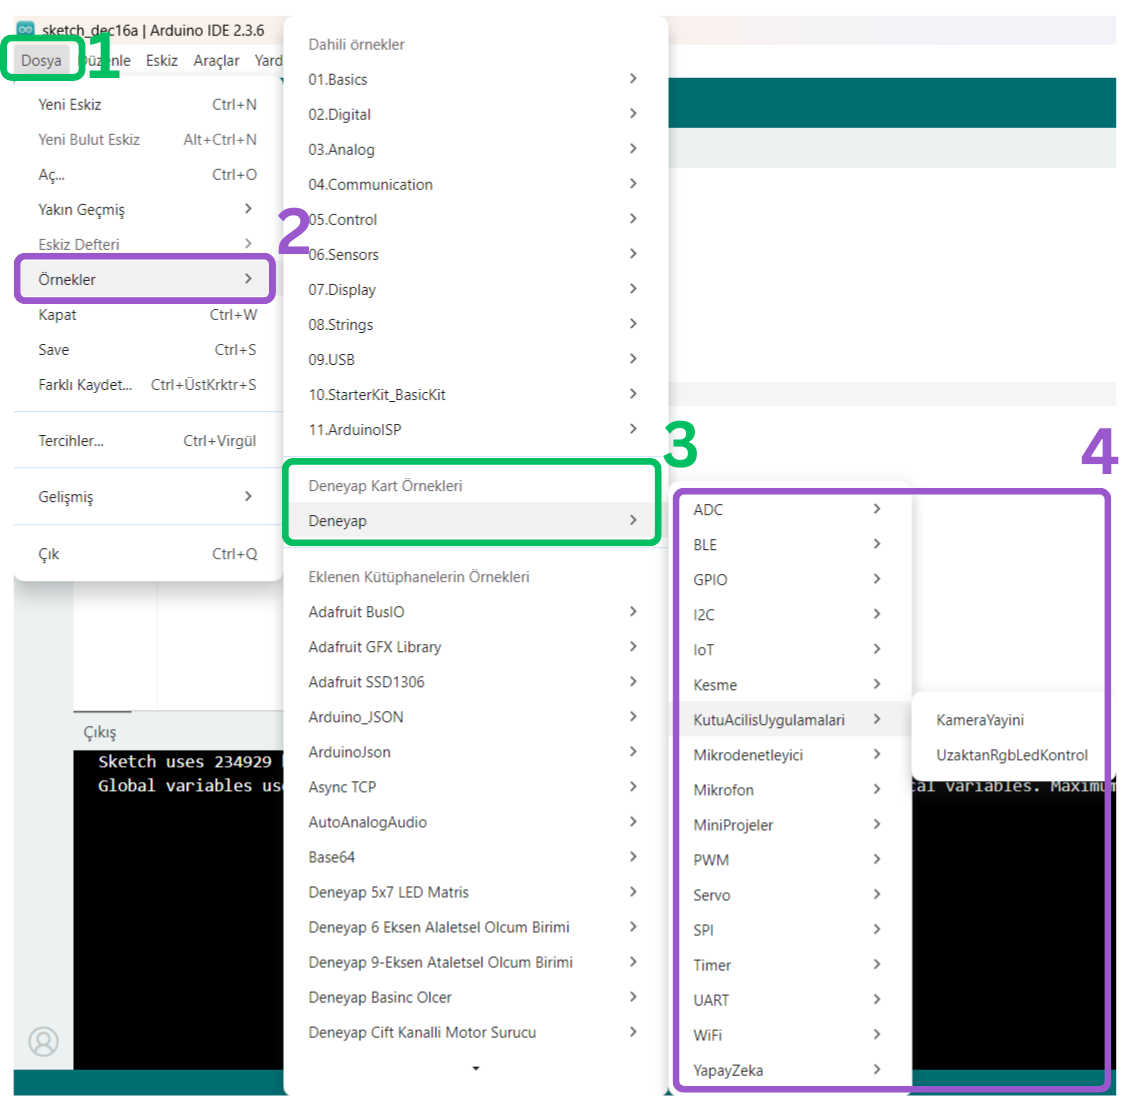
 To access example codes, follow **File → Examples**, then navigate to **“Examples for Deneyap Kart”**.
 ## USB Driver
By clicking the link below and following the USB driver installation steps, you must install the CP210X driver required for **Deneyap Kart** and **Deneyap Kart 1A** boards. For other Deneyap development boards, installing a USB driver is not required.
[USB Driver Installation](https://docs.deneyapkart.org/Kartlar/usb-surucu-kurulumu)
## USB Driver
By clicking the link below and following the USB driver installation steps, you must install the CP210X driver required for **Deneyap Kart** and **Deneyap Kart 1A** boards. For other Deneyap development boards, installing a USB driver is not required.
[USB Driver Installation](https://docs.deneyapkart.org/Kartlar/usb-surucu-kurulumu)